Dorayaki Pancakes: The Sweet Japanese Pancake You Need
Learn how to make authentic dorayaki pancakes, a popular Japanese dessert, with our easy-to-follow guide. Perfect for anyone looking to try something new.
12 min read
I still remember the first time I tasted one at a tiny bakery in Tokyo — the warm, honey-kissed cakes hugged a smooth, sweet red bean center and felt like a soft, edible memory.
These small, round treats mixed precision and comfort. Home cooks learned that low heat, a quick wipe of the pan, and a brief rest for the batter made the difference between patchy rounds and bakery-perfect discs.
Their charm went beyond flavor; they carried culture. Doraemon’s fondness for them made the snack feel playful and familiar across generations.
With simple ingredients like flour, sugar, eggs, and honey, plus a filling of anko or red bean paste, you could make a reliable recipe at home. For tips on making anko or buying it, see this guide at junandtonic.
Key Takeaways
- These Japanese pancakes are small, evenly browned, and filled with sweet red bean paste.
- Low heat and a well-wiped pan produce smooth, uniform tops.
- A short batter rest improves tenderness and texture.
- Basic pantry ingredients—flour, sugar, eggs, honey—are all you need.
- You can buy anko or make it yourself for authentic flavor.
What Are Dorayaki and Why They’re Different from American Pancakes
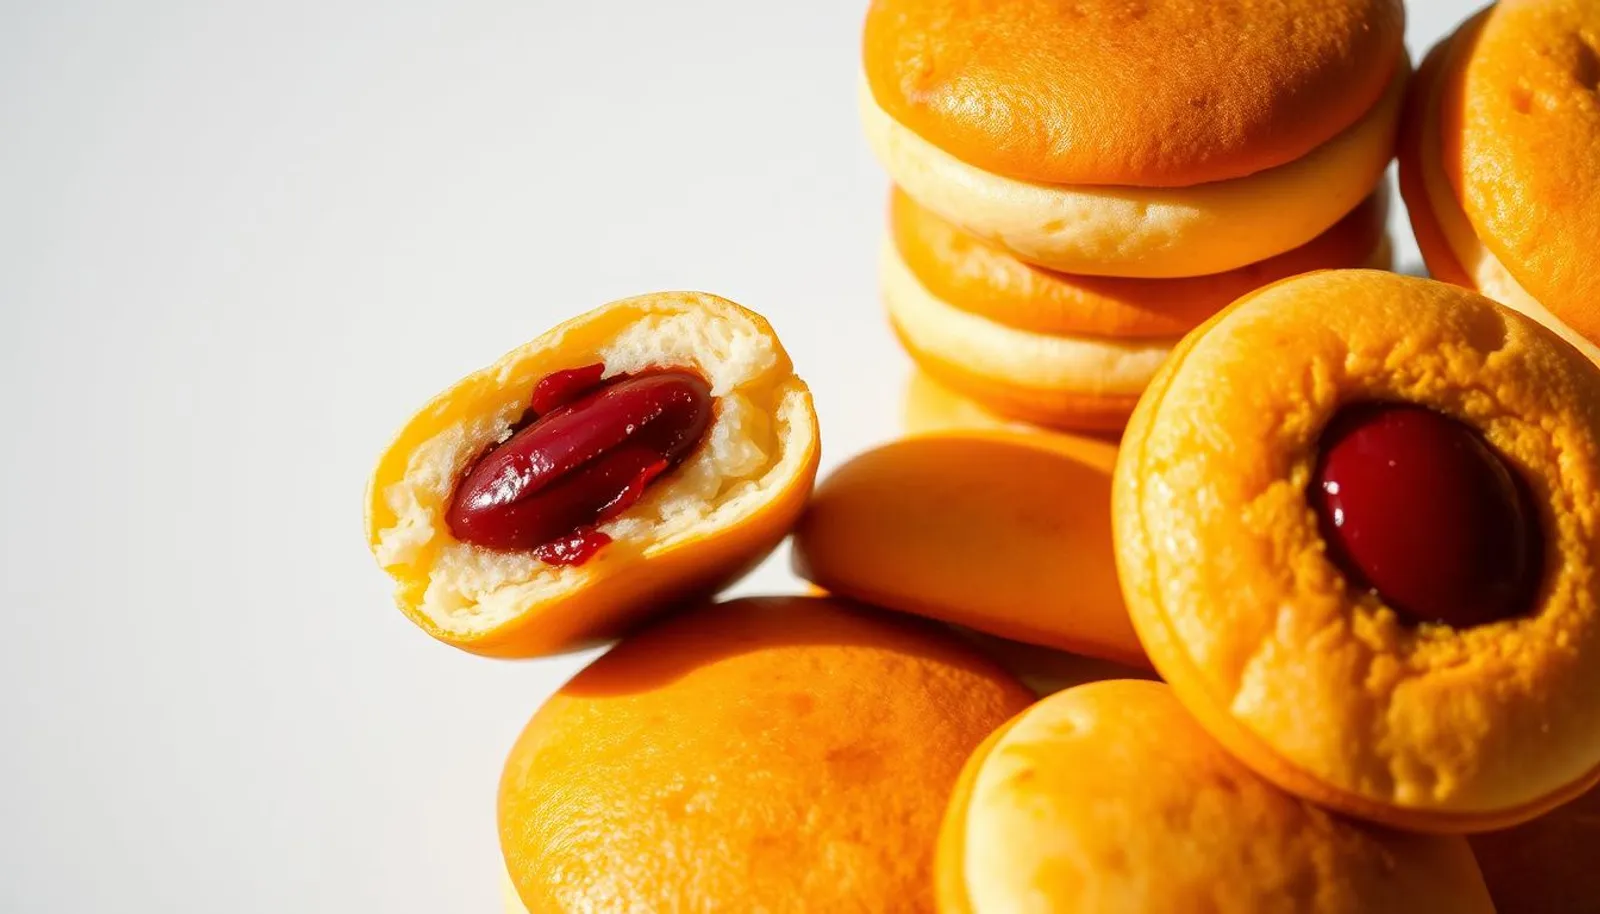
A compact, domed cake behaves very differently on the griddle than a tall breakfast stack. These dorayaki are two small, honey-sweet pancake rounds that enclose smooth azuki red bean paste. Each one is intentionally petite—about three inches—so heat reaches the center before the surface over-browns.
 Size, ingredients, and technique set them apart. The batter leans on honey (and sometimes mirin) instead of dairy, giving a tender, sponge-like crumb. Low temperature and an even pan surface produce a seamless, golden finish rather than mottled spots.
- Use a non-stick pan with a whisper-thin film of oil, then wipe with a paper towel to avoid patches.
- Flip when bubbles form at the side and the top sets; timing depends on your pan and temperature.
- Sandwiching two rounds hides any scuffs on the flipped side and keeps the filling moist.
With careful pan prep and steady heat control, the flour-and-sugar mixture bakes into a uniform, honeyed treat that pairs perfectly with red bean paste.
Ingredients and Tools for Authentic Japanese Pancakes at Home
A few faithful ingredients and the correct tools will give you an authentic result at home.
Core ingredients are simple: eggs, sugar, honey, flour and a touch of baking powder. Add 1–2 tbsp water to reach a pourable batter that still holds shape. Use cake flour or Japanese soft wheat flour for the most tender crumb; all-purpose flour works if you prefer a slightly chewier texture.
Choosing and preparing anko
Anko comes in two main styles: tsubuan (chunky) and koshian (smooth). Both are sold in cans or pouches at many Asian groceries across the U.S.
“If you make anko from dried azuki beans, simmer until soft, then mash and sweeten for deep, clean flavor.”
For shopping tips and a reliable starter recipe, see this anko guide.
Tools and small boosters
- Mix batter in a large bowl and sift flour with baking powder for even distribution.
- Use a non-stick pan, oil it lightly, then wipe the surface with a paper towel to avoid spots.
- A small ladle or measuring cup makes consistent rounds; a flexible spatula helps flipping.
- Optional boosters: mirin, vanilla, matcha, or chestnut pieces to personalize the paste or batter.
Measure leavening precisely—think tsp accuracy—so the mixture rises without a chalky taste. Keep a small bowl of water nearby to fine-tune consistency as you mix.
Step-by-Step: How to Make Dorayaki Pancakes
A few careful steps—soaking, whisking, and gentle cooking—deliver a tender cake wrapped around sweet red bean paste.
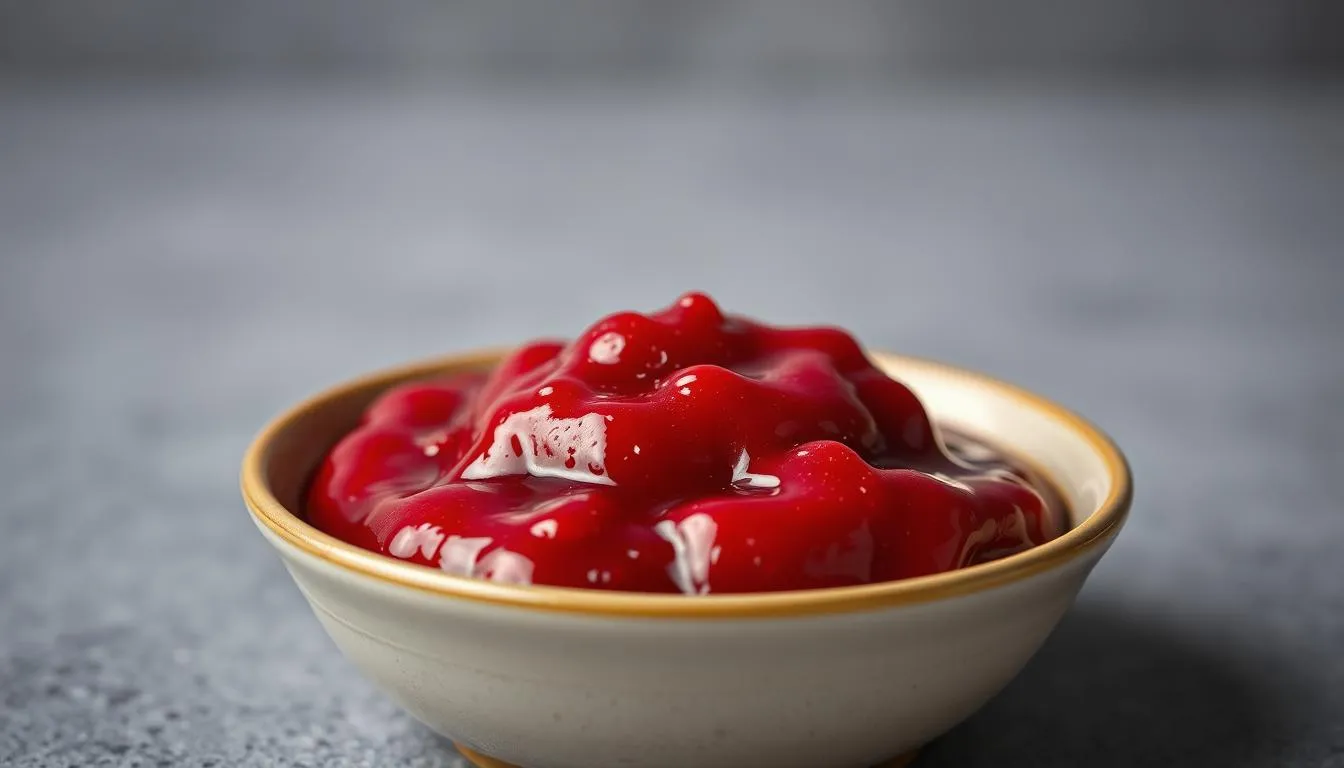
Make the sweet red bean filling first. Soak azuki beans 12–48 hours, then simmer on low for 60–90 minutes until the beans mash easily. Drain any excess liquid, mash the beans, and sweeten while warm so the sugar dissolves into a smooth paste.
Mix the batter
In a bowl, whisk eggs with sugar and honey until lighter. Sift in flour and baking powder, then whisk until smooth.
Let the batter rest 15–30 minutes. After resting, add water 1 tsp at a time until the batter flows in a steady ribbon but is not runny.
Cook the rounds
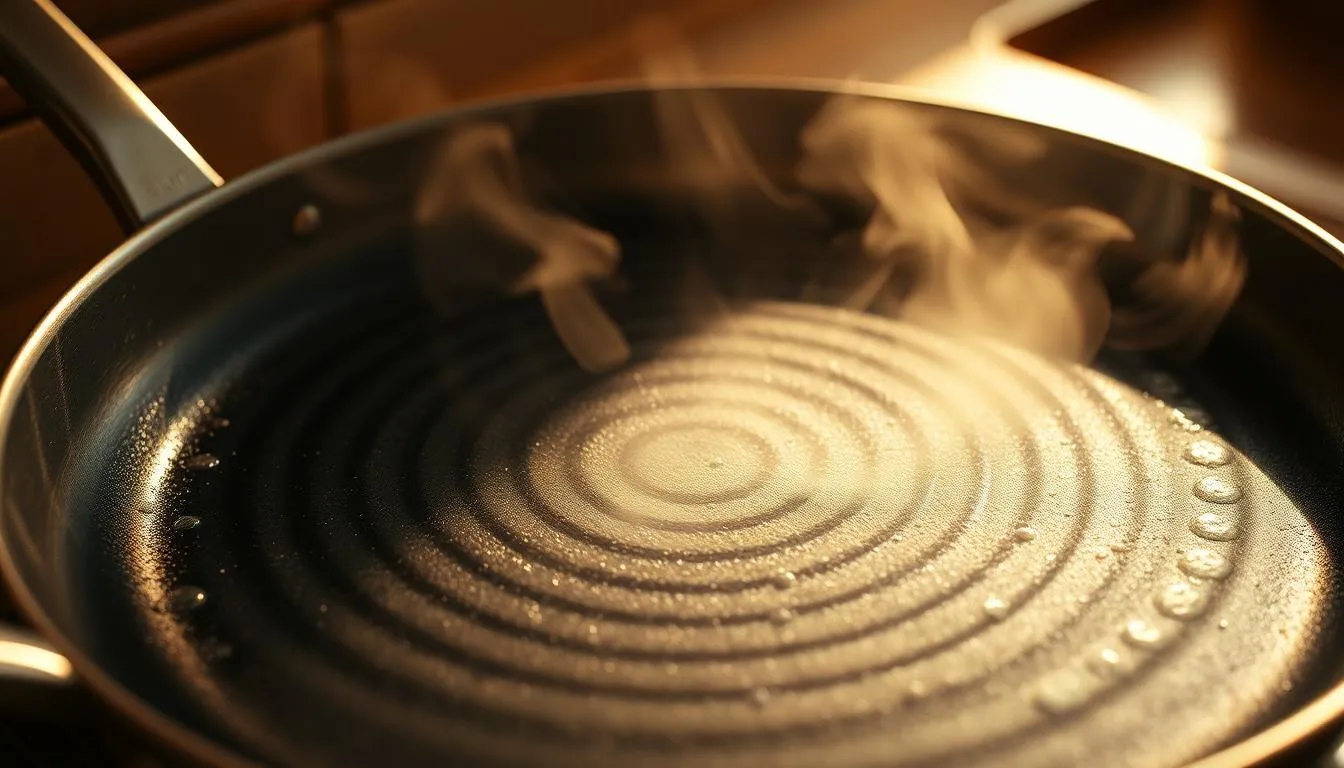
Preheat a non-stick pan over low heat and swipe a scant film of oil, then wipe it off. Pour about 3 Tbsp batter from a few inches above to form ~3-inch rounds.
Watch for bubbles at the edge and a set top as your flip cue. Flip decisively; cook the second side for just 20–60 seconds so the interior stays moist and the color is even.
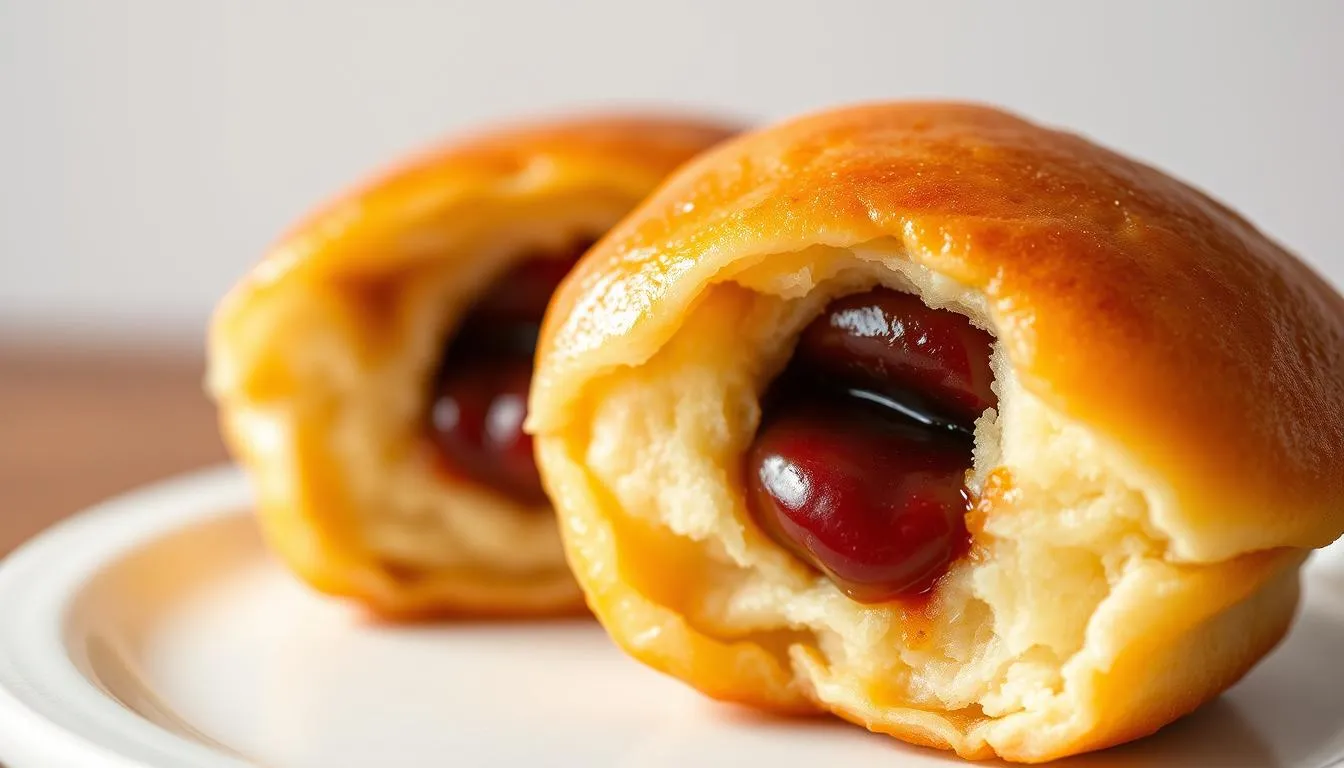
Assemble and finish
Cool each pancake briefly on a rack. Mound the sweet red bean paste in the center, place a second round on top, and press the edges to seal the sandwich.
Wrap each treat with plastic wrap to lock in moisture and let the filling settle before serving or storing.
Pro Tips for Evenly Golden, Fluffy Japanese Pancakes
Perfect browning starts long before the first pour—it’s about patience, heat, and a clean pan. Mastering these small details gives you consistent color and a plush interior every batch.
Master heat and oil
Preheat slowly on low, then nudge the temperature to medium-low so the honey and sugar brown without burning. Use a neutral oil sparingly, coat the non-stick surface, then wipe with a paper towel to remove streaks.
Batter consistency and rest
Let the batter rest 15–30 minutes so the flour hydrates and the baking action evens out. After resting, thin the mixture with water by the teaspoon until it pours like standard batter but still holds shape.
Flip timing and surface cues
Flip when a ring of bubbles appears at the edge and the center looks set but still moist. In many pans that means about 1:15–1:30 on the first side and 20–30 seconds on the second side for ideal color and height.
Cooling and handling
Move finished rounds to a wire rack and cover loosely with a damp towel to keep them soft. Match pieces by color and size, then press edges to seal—this helps fillings stay centered and gives a neat, bakery-style finish.
Fillings, Variations, and Make-Ahead Storage
Fillings transform a small cake into a new snack with every bite.
Try custard cream, matcha cream, whipped cream, or chestnut as approachable alternatives to sweet red bean. Many shops also pair matcha cream with anko for contrast. A thin layer of red bean paste under a creamy filling adds structure and depth.
“Keep unfilled rounds under a damp towel while assembling to stop edges from drying.”
For freshness, wrap each sandwich tightly with plastic wrap after filling. This seal keeps moisture in and helps the dome shape set.
- Room temperature: wrapped, about 2 days.
- Fridge: wrapped, up to 5 days.
- Freezer: wrapped and bagged, up to 1 month; thaw at room time before serving.
| Filling | Texture | Best pairing | Storage tip |
|---|---|---|---|
| Sweet red bean | Thick, slightly grainy | Matcha or chestnut | Wrap; room temp 2 days |
| Custard cream | Silky | Lightly sweet batter | Refrigerate up to 5 days |
| Whipped cream | Airy | Fresh fruit or anko | Freeze for longer storage; thaw before serving |
Common Mistakes and Quick Fixes for Dorayaki
Most problems come from four things: pan prep, batter balance, heat control, and handling. Fixing each of these gives you more reliable results and fewer wasted batches.
Patchy color or spots
Cause: excess oil or streaks on the pan surface.
Lightly brush a neutral oil, then wipe the pan with a paper towel so only a whisper-thin film remains. Visible streaks make blotches when the batter hits the hot surface.
Dense or flat cake
Cause: inactive baking powder or wrong batter thickness.
Check that your baking powder is fresh. If the batter plops instead of flowing, thin it a bit so it holds shape but can rise. If the mix spreads too much, sift in a tablespoon of flour to restore body.
Drying out
Cause: overcooking or poor handling after cooking.
Flip when bubbles ring the edges and the center looks set. Avoid too many seconds on the first side or too-high heat—both dry and toughen the crumb.
Keep finished rounds under a damp towel while you assemble. Once filled, wrap each sandwich to lock in moisture.
“Flip when bubbles form and the center is set — that cue saves texture more than timing alone.”
- Rotate the pan or switch pans if one side colors faster.
- Brush oil sparingly; wipe off excess before each pour.
- Troubleshoot by checking leavening, batter, pan prep, and flip cues in that order.
| Problem | Likely cause | Quick fix |
|---|---|---|
| Patchy tops | Oil streaks on surface | Wipe pan; use a light film of oil |
| Dense rounds | Old baking powder / thick batter | Replace powder; thin batter slightly |
| Flat results | Batter too runny | Add a little flour; sift to avoid lumps |
| Dry crumb | High heat / long first side | Lower heat; flip on bubbles and set |
Conclusion
Nailing the flip and keeping the pan just-so turn a good batch into a great one.
This recipe pairs a forgiving batter of flour, sugar, eggs and honey with a smooth anko filling to make a tidy sandwich that pleases every time.
Work on low heat, wipe oil thin, and flip when bubbles ring the edge. That cue gives a uniform, golden top and a soft interior in one pancake to join its partner.
Wrap extras for up to two days at room temperature, then chill or freeze for longer time. With these small habits, you can recreate bakery-quality dorayaki and start riffing on fillings and flavors.
FAQ
What makes these sweet Japanese pancakes different from American versions?
These treats use a slightly thicker batter with honey and beaten eggs for a tender, cake-like crumb. They’re cooked on low heat until small surface bubbles form, then flipped briefly to get an even, golden top. Instead of syrup, they’re traditionally sandwiched with sweet red bean paste for a balanced, not overly sweet result.
What core ingredients do I need to make authentic Japanese-style pancakes at home?
Gather eggs, all-purpose flour, sugar, honey, baking powder, and a little water. Whisk the eggs and sugar until smooth, fold in sifted flour and baking powder, then adjust with water to reach a pourable but thick batter. Resting the mixture for about 15–30 minutes helps produce a light texture.
How do I choose and buy red bean paste (anko) in the U.S.?
There are two main types: tsubuan (chunky) and koshian (smooth). Look for them in Asian grocery stores or online from brands like Marukyo or Eden Foods. If you want a milder sweetness, check ingredient lists—some commercial pastes add extra sugar or preservatives.
Can I add flavors like matcha or vanilla to the batter?
Yes. A teaspoon of vanilla or a tablespoon of matcha powder can be folded into the dry ingredients for subtle flavor. Mirin or a touch of chestnut purée also work as optional boosters, but add these sparingly so the texture stays right.
What pan and oil technique gives the best surface and color?
Use a non-stick skillet or griddle over low to medium-low heat. Lightly oil the surface with a neutral oil, wipe excess with a paper towel, then pour batter. That thin oil film prevents sticking without causing patchy spots or too-dark edges.
How should I prepare the sweet red bean filling if I make it from scratch?
Soak dried azuki beans overnight, simmer until tender, then mash or pulse to your preferred texture. Sweeten gradually with sugar while cooking until it reaches a spreadable consistency. Cool before assembling so it won’t melt the batter.
What’s the best cooking method to get an even, fluffy result?
Preheat the pan gently, pour small rounds of batter, and watch for bubbles forming at the surface and edges. Flip quickly—just a few seconds—once the tops have set but remain slightly moist. Overcooking yields dense texture, so keep heat low and timing strict.
How do I assemble and store the finished sandwiches for later?
Spoon a mound of filling onto one cake, top with a matching cake, press lightly at the edges, then wrap each sandwich in plastic wrap. Store wrapped in the fridge for up to 3 days or freeze on a parchment-lined tray then transfer to a sealed bag for up to a month.
Why do some come out with patchy color or dark spots?
Patchy color usually means excess oil on the pan or too-high heat. Wipe the surface with a paper towel after oiling and keep the skillet on low. Also check that the batter isn’t too thin, which can cause uneven browning.
What causes a dense or flat result and how can I fix it?
Dense texture often comes from inactive baking powder or overmixing. Use fresh baking powder, sift it with flour, and fold batter gently. If it’s too thick, add a tablespoon of water at a time to loosen consistency, then rest before cooking.
How do I prevent the cakes from drying out after cooking?
Stack them with a slightly damp paper towel over the top, then wrap in plastic to retain moisture. Avoid leaving them uncovered on a rack for long periods; once cool, store wrapped to preserve softness.
Can I substitute fillings like custard or whipped cream?
Yes. Custard, matcha cream, chestnut purée, or stabilized whipped cream make excellent alternatives. Keep creamy fillings chilled and consume within a day or two to maintain texture and safety.