Okoge Recipes: A Guide to Japanese Cooking
Discover delicious okoge recipes. Learn how to make traditional Japanese okoge dishes with our easy-to-follow guide.
20 min read
There are meals that feel like home the moment steam rises from the pot. I still remember the first time I tasted takikomi gohan at a friend’s kitchen and how the caramelized bottom changed everything.
This introduction will guide you through that humble yet craveable rice dish. You’ll learn why takikomi gohan differs from maze gohan, what makes japanese rice like koshihikari shine, and how shiitake and seasonal vegetables build deep flavor.
Practical gear matters: a rice cooker with a Mixed Rice setting, a heavy pot, or a clay cooker each create different textures. Simple prep—rinse rice in a bowl until water runs clear, soak, then drain—helps every batch cook evenly.
Learn how dashi, soy, mirin, and sake seasonings pair with chicken or vegan kombu stock. With a few tips and under an hour of hands-on time, you can make a homey dish with a crisp, savory bottom that begs for seconds.
Key Takeaways
- Takikomi gohan is seasoned mixed rice; maze gohan mixes toppings after cooking.
- Use koshihikari or short-grain japanese rice and rinse in a bowl for best texture.
- A rice cooker’s Mixed Rice program helps create the caramelized bottom.
- Common ingredients: shiitake, carrots, gobo, aburaage, and optional chicken.
- Prep ahead and freeze leftovers; they make great onigiri or fried rice.
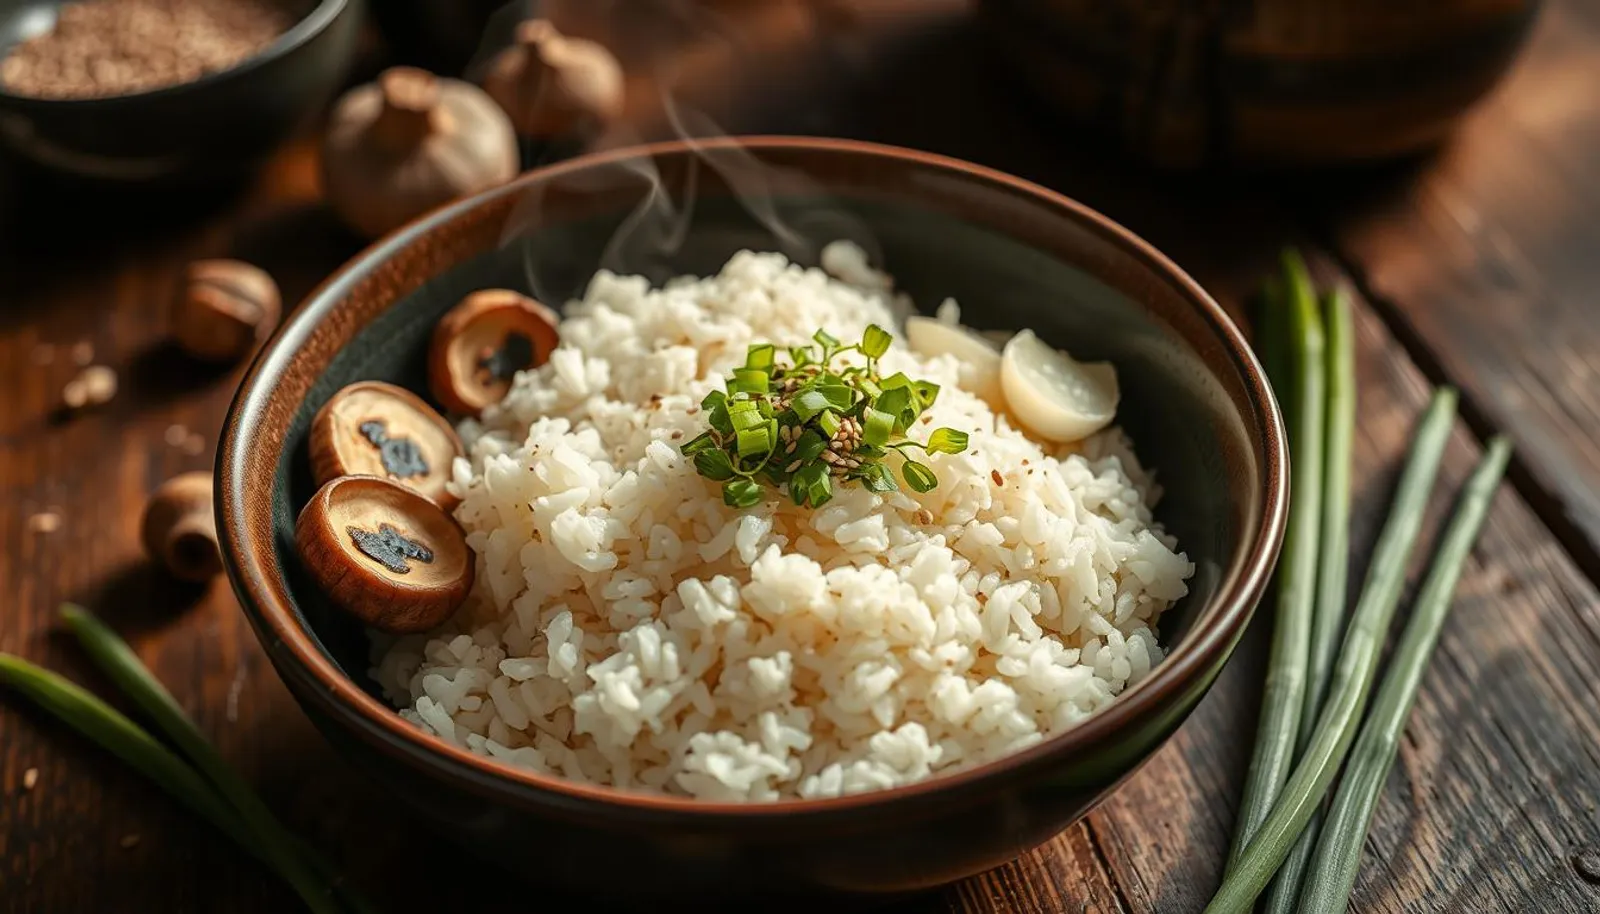
Welcome to crispy, caramelized rice bliss
Every pot holds a hidden treasure: the crunchy, caramelized layer at the very bottom. This crisp edge forms when starch, soy and steam concentrate close to the heat source.
Think of it as intentional caramelization, not burnt food. A little soy sauce or savory sauce at the start helps flavors concentrate as water evaporates. The result is aromatic, slightly sweet, and deeply savory.
Many cooks use a rice cooker with a Mixed Rice program to get consistent results with minimal fuss. On the stovetop, try a short boost of heat for a couple of minutes near the end to build that crunchy layer.
- Texture contrast: tender grains above, crisp golden bits below.
- Scoop gently: lift pieces from the bottom without scraping the pot.
- Finish at the table: a drizzle of soy and toppings highlights the crunch.
What is okoge and why it’s so beloved in Japanese rice dishes
The browned crust under a pot of mixed rice is one of Japan’s quiet comforts. It forms when starch, seasonings, and heat meet at the bottom and toast into a crunchy, savory layer.
The charred bottom rice explained
Okoge is lightly charred, slightly crunchy rice prized for its toasty aroma and concentrated umami. Soy and sugars in the seasonings encourage browning, while dashi adds deep savory notes.
Takikomi gohan vs. maze gohan: where it shines
In takikomi gohan, uncooked rice cooks with mushrooms, proteins, and seasonings in one pot, so the bottom absorbs broth flavors and often forms that treasured crust.
Maze gohan folds cooked toppings into finished rice when you want delicate textures preserved—scallops, for example, stay tender this way.
- Start heating right after adding soy, dashi, and water to keep layers from separating.
- Rice cooker Mixed Rice programs manage moisture to encourage gentle browning on the bottom.
- Choose takikomi gohan when you want rice that tastes fully integrated with the dish.
“The toasty edge gives a small, intense burst of flavor that makes simple rice feel special.”
Key ingredients for flavorful okoge: Japanese rice, dashi, and seasonings
Start with quality staples and the rest falls into place: rice, dashi, and measured seasonings form the backbone of great bottom rice.
Japanese short‑grain white rice (koshihikari) gives the right starch and stickiness. Rinse 3–4 times until bowl water runs nearly clear. Soak 20–30 minutes and drain for 15 minutes before cooking. This helps grains hydrate evenly and encourages a good crust.
Dashi options
Build flavor with awase dashi for balance, shiitake soaking soup for mushroom depth, or kombu/shiitake for a vegan stock. Use the strained soak rice water or shiitake soup to boost umami when you measure liquids in cups for your cooker or pot.
Seasonings and add‑ins
- Season with soy sauce, mirin, sake, and a touch of sugar for rounded aroma and color.
- Proteins and add‑ins: chicken thigh, aburaage (parboil first), konnyaku (brief boil), and sliced mushrooms.
- Vegetables: thinly shaved gobo, carrots, bamboo shoots, peas, or sweet potatoes work well.
| Ingredient | Prep | Why it matters | Portion tip |
|---|---|---|---|
| Koshihikari rice | Rinse & soak | Proper starch for cohesion | Base (70–80%) |
| Awase / shiitake dashi | Strain & reserve | Umami backbone | Measure in cups |
| Soy sauce, mirin, sake | Mix into stock | Balance salt, sweet, aroma | Use sparingly |
| Vegetables & proteins | Thin slice / parboil | Even cooking; texture | Keep to 20–30% of volume |
“A little soy goes a long way — balance is the key to savory, not salty, rice.”
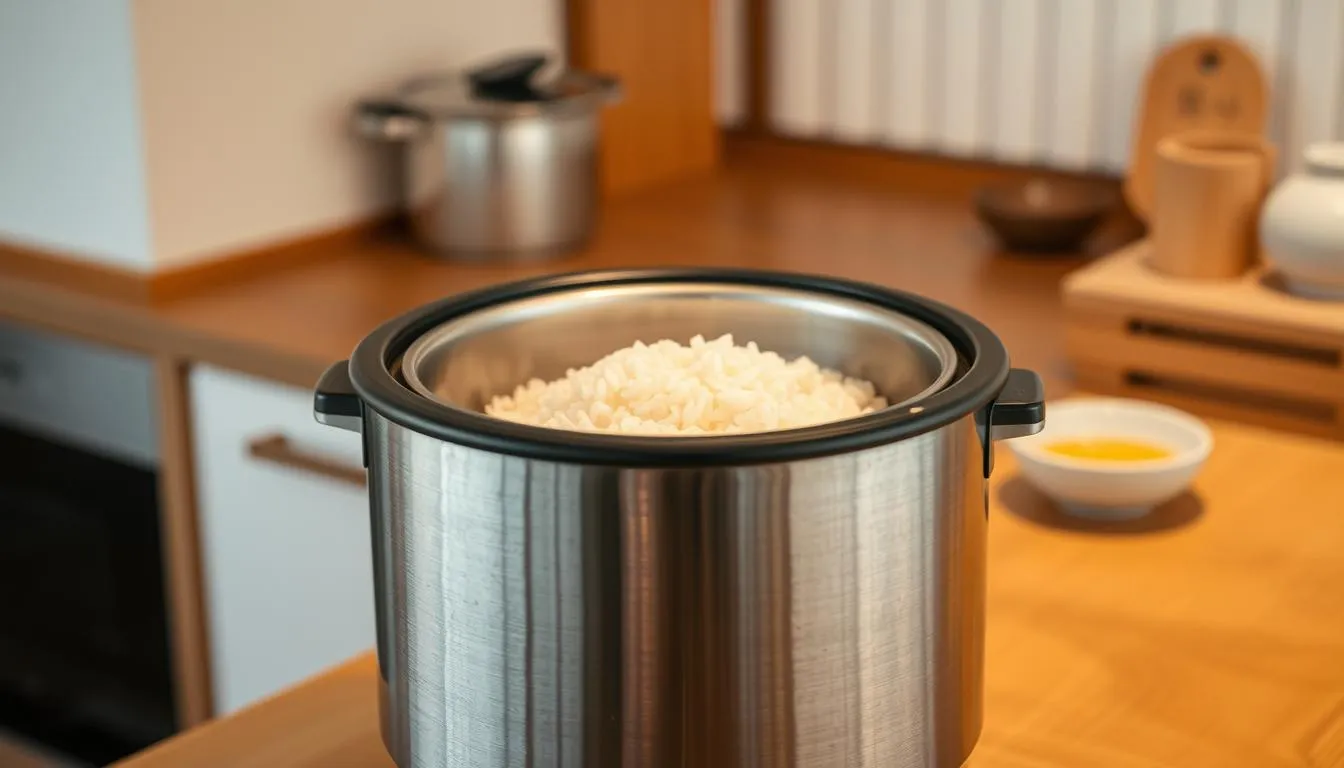
Using a rice cooker: mixed rice setting for effortless okoge
A good rice cooker can turn a simple batch of seasoned rice into a golden, savory delight with almost no fuss.
Wash, soak, and drain: Rinse 3–4 times in a bowl until the water clears. Soak 20–30 minutes and drain for 15 minutes so grains rice absorb water evenly before you add seasonings.
Layering technique: Transfer the drained rice to the cooker bowl. Add mirin and soy sauce, then pour in your combined dashi. Use the cup lines if you need to add water as directed by your model.
 Level the surface gently, then layer hard ingredients first and delicate items on top. Do not stir. Close the lid and start cooking immediately to prevent separation and to help the rice absorb flavor.
Mixed Rice vs Regular
- Select the Mixed Rice program to encourage caramelization; soy sauce in the pot helps form a savory bottom rice.
- If your cooker lacks that mode, let it sit on keep‑warm for an extra 5 minutes before opening.
- Fluff with slicing motions to mix ingredients without crushing grains and avoid peeking early; trapped heat builds aroma and finish.
Stovetop and clay pot methods for deeper caramelization
A warm, steady pot on the stove can coax out a deeper, toastier layer than a cooker ever will. For this approach, choose a heavy pot like cast iron or a donabe. These vessels deliver even heat that encourages a flavorful brown layer at the bottom without burning the grains.
Cast iron or donabe: steady heat for even browning
Place rice, seasonings, and add-ins into the pot and measure liquids by cup. Level the surface and layer harder vegetables on top so they steam through while the rice cooks below.
Heat control: bring to boil, gentle simmer, finish with a brief high-heat boost
Bring the pot to a lively boil over medium heat with the lid on, then reduce to low. Let it simmer for 15–20 minutes as the water is absorbed and bubbling quiets.
For a thin crunchy edge, briefly increase heat for 1–2 minutes just before turning heat off. Then immediately turn off heat and let stand minutes with the lid sealed.
Resting with lid on: steam to set grains, then fluff
After turning heat off, let stand 10 minutes so steam finishes cooking the rice and sets texture. Keep the lid closed; lifting it loses vital moisture.
Open, then fluff gently with a paddle to mix top and bottom without crushing grains. Note your stove’s sweet spot and adjust the final boost if you want more or less browning next time.
“A short, controlled lift in heat will give you a thin, toasty bottom without crossing into burnt.”
- Use a heavy pot for steady, even heat and better browning at the bottom.
- Measure rice and water by cup, layer ingredients, and never stir after starting to cook rice.
- Simmer 15–20 minutes, boost heat 1–2 minutes to form a crust, then let stand 10 minutes with the lid on.
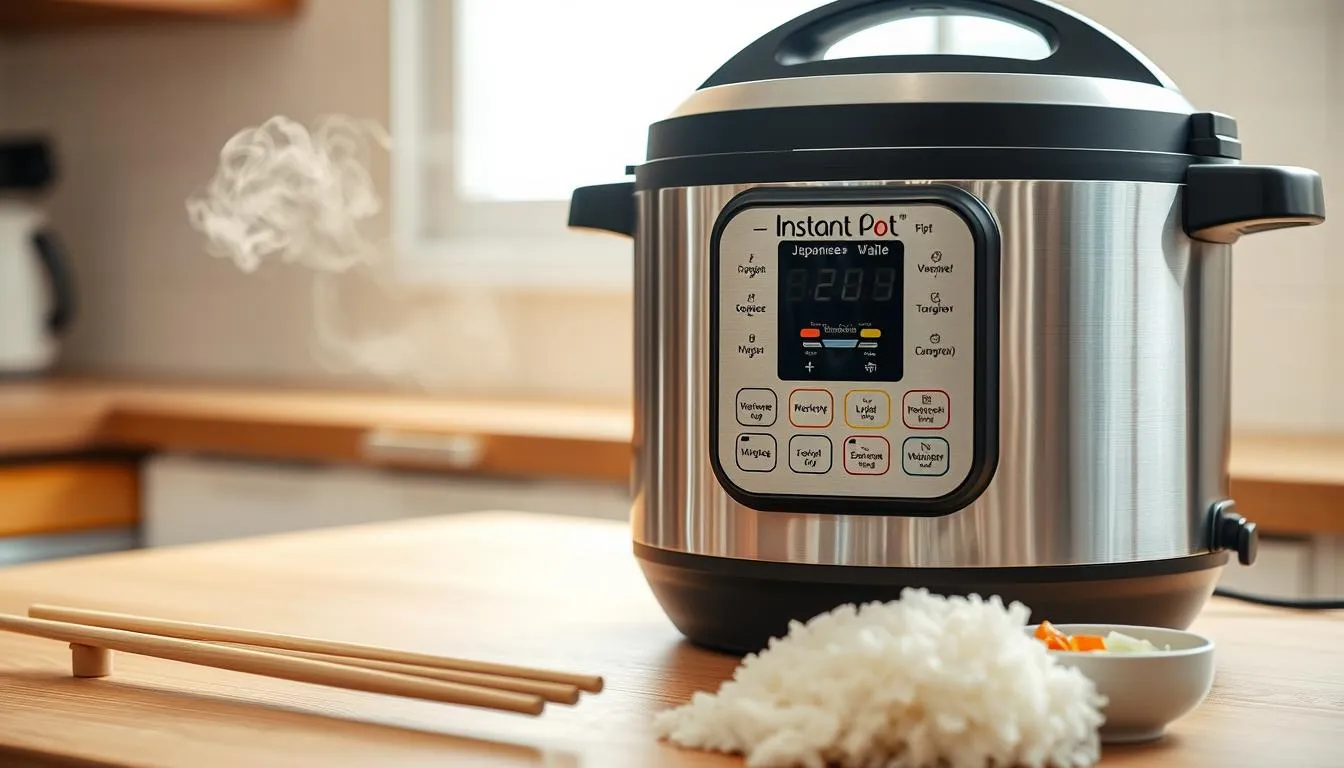
Instant Pot approach: pressure cooked convenience with Japanese flavor
An Instant Pot shortens hands-on time while still letting seasonings infuse the rice. Wash and soak short‑grain rice first so grains cook evenly under pressure with added flavor.
Liquid ratios and timing: aim for about 1:1 rice to total liquid when soy and dashi count toward the water. Measure cups precisely—small changes affect texture.
Layer ingredients over the rice, putting sturdier items on the bottom. Do not stir; this prevents scorching and protects the bottom rice.
Quick steps and finishing tips
- Seal the cooker and pressure cook per your model’s guidance—use the “Rice” or low manual setting for short‑grain; follow the minutes recommended by your manual.
- Use quick release if your Instant Pot suggests it for rice; otherwise follow the recommended let stand minutes for the best texture.
- Open, check moisture, and gently fluff. To get a light crust, use Sauté for a very short turn of heat—watch closely to avoid heavy sticking.
- Add soy sauce before sealing for depth, but use it sparingly; pressure concentrates seasoning.
Tip: If sticking is excessive, shorten the sauté step next time and log water adjustments by tablespoons to dial in your perfect finish.
Okoge recipes
Try these simple preparations to highlight a golden, toasty layer beneath fluffy Japanese rice.
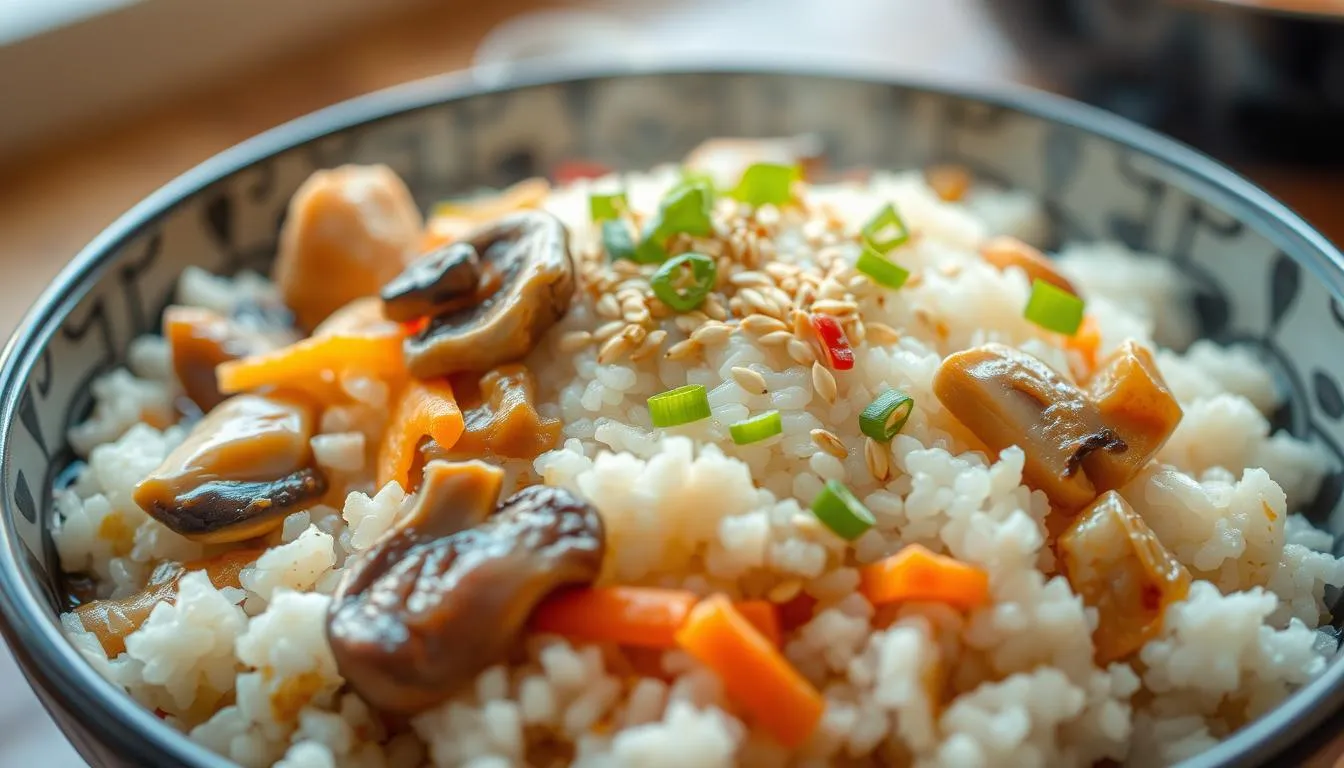
Classic chicken takikomi gohan with soy sauce and dashi
Ingredients: 1.5 cups uncooked short‑grain rice, shiitake (rehydrated in 1/2 cup water), konnyaku, aburaage, carrots, gobo, sliced chicken thigh.
Combine shiitake soak with additional dashi to 1.5 cups total. Stir in 1.5 Tbsp mirin and 1.5 Tbsp soy sauce. Layer rice and ingredients without mixing. Cook on the Mixed Rice setting and fluff to distribute; the bottom will form a savory crust.
Vegan maitake rice with ginger: light color, deep umami
Ingredients: 1.5 cups rice, 1.5 cups water, 1 Tbsp soy sauce, 1 Tbsp sake, 1/2 Tbsp mirin, 1 tsp sea salt, julienned ginger, 4 oz maitake mushrooms.
Keep soy modest so the grains stay light. Cook covered until water is absorbed. Boost heat 1–2 minutes to make a thin crunchy base, then rest 10 minutes before fluffing for best texture.
Simple soy‑butter okoge snack: scrape, season, and enjoy
Scrape warm crust into a bowl. Toss with a dab of butter and a few drops of soy sauce. The result is a quick, rice‑cracker style snack with toasty aroma.
| Dish | Main liquid | Key seasoning | Finish tip |
|---|---|---|---|
| Chicken takikomi gohan | 1.5 cups dashi (includes shiitake) | 1.5 Tbsp soy sauce, 1.5 Tbsp mirin | Mixed Rice setting; fluff to mix |
| Vegan maitake rice | 1.5 cups water | 1 Tbsp soy, 1 Tbsp sake, 1/2 Tbsp mirin | Boost heat 1–2 minutes; rest 10 minutes |
| Soy‑butter snack | N/A | Butter + soy drops | Scrape warm; serve immediately |
“Adjust seasoning in future batches — a pinch of sugar or extra mirin smooths the profile.”
Water ratios, soak times, and minute-by-minute timing
Getting water ratios and timing right is the secret to fluffy grains and a flavorful crust. Small adjustments to soak and liquid make a big difference when you cook takikomi gohan.
Rinse and rest first. Wash rice 3–4 times in a bowl, changing the rice water until it runs nearly clear. This removes surface starch and prevents gumminess.
Soak 20–30 minutes (extend slightly in cold weather), then drain for at least 15 minutes. Letting grains sit helps them rice absorb water evenly and keeps the texture steady during cooking.
Rice-to-liquid guidance for each method
For many seasoned mixed rice dishes, aim for about 1:1 total liquid to rice when soy and dashi count toward the liquid. In a rice cooker, use the vessel’s cup lines for accuracy.
On the stove, measure cups precisely. In an Instant Pot, start near 1:1 and adjust by tablespoons if your appliance tends to evaporate more or less.
When to add seasonings
Add soy, mirin, and dashi just before you start cooking. Putting seasonings in at the start helps the rice absorb flavor rather than sitting in salty liquid that can yield mushy grains.
- Rinse: change rice water until clear to reduce stickiness.
- Soak & drain: 20–30 minutes soak, 15 minutes drain.
- Measure: use cup lines for cookers; count cups in pots.
- Timing: stove simmer 15–20 minutes, rest 10 minutes; follow your cooker’s program for minutes and adjust slightly as needed.
- Notes: track dashi strength and how your rice absorb water to refine results.
| Method | Liquid ratio | Key timing | Quick note |
|---|---|---|---|
| Rice cooker | ~1 cup liquid per cup rice (use lines) | Follow program; +5 min keep‑warm for crust | Measure in the bowl for consistency |
| Stovetop / pot | 1:1 when seasonings included | Bring to boil, simmer 15–20 min, rest 10 min | Boost heat 1–2 min for thin crust |
| Instant Pot | Start near 1:1; tweak by tbsp | Pressure cook per model; let stand per manual | Season before sealing; pressure concentrates soup flavors |
“Keep a small log of cup measures, water adjustments, and outcomes — your notes will lock in repeat success.”
Troubleshooting the bottom rice: avoiding sticky, burnt, or hard spots
A few simple checks will save your rice from becoming gummy, hard, or overly dark at the base. Start with portion control and timing to keep the texture even and the flavor balanced.
Too many add‑ins
Keep ingredients to about 20–30% of cooked rice volume. Extra vegetables or proteins soak up liquid and leave grains underdone. If rice seems gummy, reduce add‑ins next time or add a tablespoon of extra liquid.
Layer separation and dilution
Always start cooking immediately after adding seasonings and transferring to the bowl or pot. Waiting lets layers form and causes uneven absorption at the bottom.
Hard vs tender ingredients
Place firm items (gobo, carrots) first and softer items on top. Cut sizes matter: thin pieces finish faster and help everything cook together.
- Do not stir before cooking—mix only when fluffing.
- If the bottom gets too dark, shorten any heat boost or cut soy slightly.
- If pale, try a brief controlled heat increase or use the Mixed Rice program on your rice cooker.
- Freeze leftovers rather than refrigerating to avoid dry, hard rice.
“Track times, ingredient amounts, and cut sizes in notes so each batch improves.”
Serving ideas, toppings, and nutrition notes
Bright, fresh toppings add contrast to the rich flavors at the base of the pot. Serve the dish hot in a bowl and garnish with chopped mitsuba or thinly sliced scallions for a herbaceous pop.
Table toppings include toasted sesame, nori strips, a light sauce drizzle, or yuzu kosho for citrus heat. Offer shichimi togarashi on the side for more spice.
Toppings and seasonal touches
Keep a small tray of garnishes at the table so diners can customize each cup. Add toasted sesame for crunch or a soft raw egg yolk for silkiness when appropriate.
Nutrition notes and portioning
One example serving of chicken takikomi gohan is roughly 371 kcal: about 70 g carbs, 14 g protein, 2 g fat, and ~4 g fiber. Values shift with ingredients and portion size.
- Portion by cup for consistent servings; pair with miso soup and quick pickles for a balanced meal.
- Mushrooms like maitake add fiber and can contribute vitamin D when exposed to light, boosting nutrition without heaviness.
- Chicken increases protein; aburaage adds a touch of fat. Adjust vegetables to lighten the bowl.
- Control sodium by measuring soy and using low‑sodium stock or less sauce at the table.
- Leftover bowls reheat well — add a splash of water and cover to re‑steam gently in the microwave.
“Small garnishes create big flavor shifts — a little herb or citrus will brighten every bite.”
For more guidance on a classic preparation, see a trusted takikomi gohan guideline to match cups, cut sizes, and seasoning for reliable results.
Storing leftovers and smart reuse
With a bit of care, day‑old rice becomes a versatile pantry ingredient in under an hour. Store it right and you’ll keep texture, flavor, and time saved for later.
Freeze, don’t refrigerate: best texture preservation
Portion quickly and wrap tightly so steam doesn’t escape. Freeze leftovers up to a month to avoid drying or starch changes. Avoid the fridge when possible; refrigeration speeds retrogradation and makes grains hard.
Leftover transformations: onigiri and yakimeshi fried rice
Thawed rice works well for shaped snacks and stir‑fry. For onigiri, wet hands with a little salt and press thawed rice firmly into triangles.
- Cool rice within an hour, portion, and wrap to lock moisture.
- Reheat with a teaspoon of rice water or plain water per portion, cover, and steam in the microwave for best texture.
- For yakimeshi, cook rice in a hot pan, add scrambled egg, then fold in small chopped ingredients; adjust salt to taste.
| Storage | Time | Reheat tip |
|---|---|---|
| Frozen portions | Up to 1 month | Add 1 tsp rice water, cover, microwave |
| Thawed for bento | Overnight in fridge | Heat thoroughly before eating |
| Quick fried use | Within hours of thaw | High heat, small batches |
“Portion, freeze, and you’ll have quick lunches that taste homemade.”
Conclusion
A few clear steps make takikomi gohan a dependable favorite. Rinse, soak, and drain your japanese rice, then season on a dashi base with soy, mirin, and a touch of sugar. Measure by cups for steady hydration.
Choose your tool: a rice cooker (Mixed Rice setting), cast iron, clay pot, or Instant Pot will all work. Treat okoge as a feature — the Mixed Rice program or a short heat boost creates that toasty crust.
Use small, repeatable tips: track ratios, rest rice, and freeze portions for onigiri or yakimeshi. With practice, your cooking notes will turn each pot into a better batch of takikomi gohan.
FAQ
What causes the delicious browned rice at the bottom of the pot?
The browned bottom forms when surface starches and seasonings caramelize under dry heat. Low, steady heat or a brief high-heat finish encourages Maillard reactions that create that nutty, toasty layer. Using slightly less water, a bit of soy or mirin in the cooking liquid, and a firm bottom surface (cast iron, donabe, or rice cooker inner pot) helps it develop without burning.
Can I make a crispy bottom using a rice cooker?
Yes. Use the mixed-rice or “takikomi” setting if available, rinse and soak the rice 20–30 minutes, layer sturdier add-ins first, and avoid stirring. Reducing water by about 5–10% from your usual ratio and letting the cooker sit on warm for a few minutes after cooking can promote a thin, crisp layer.
How much water should I use for short-grain Japanese rice in different methods?
For stovetop and donabe aim for about 1:1.1–1:1.2 rice to water by volume after soaking. In a rice cooker follow its marked lines for the number of cups. For Instant Pot use about 1:1.05. Adjust slightly when adding dashi, soy, or mirin—those liquids still count toward the total.
When should I add soy sauce, sake, or mirin so the rice doesn’t get soggy?
Add seasonings to the cooking liquid before you start cooking so flavors distribute evenly. Keep the overall liquid volume consistent by reducing plain water to compensate. Avoid pouring heavy sauces directly on the surface mid-cook, which can cause uneven absorption.
What are good add-ins that pair well and won’t prevent browning?
Use proteins and vegetables that release less moisture or are pre-cooked: diced chicken thigh, aburaage, konnyaku, mushrooms (sautéed or drained well), carrots, gobo, and bamboo shoots. Cut harder items small so they cook through without releasing excess water.
How do I prevent wet or gummy grains while aiming for a crispy bottom?
Rinse until water runs clear, soak 20–30 minutes, and drain 10–15 minutes. Use correct liquid ratios and avoid overloading with wet add-ins. Control heat: bring to a boil, then simmer gently; finish with a brief higher heat to crisp the base without burning the rice.
What’s the best pan for deep, even caramelization on the stovetop?
Heavy-bottomed cast iron or a donabe works best because they distribute heat steadily. Use a tight lid, start on medium-high to bring to a boil, reduce to low for simmer, and give a short burst of higher heat at the end to encourage browning.
Can I get a similar result in an Instant Pot?
Yes—pressure cook with slightly less liquid than usual, use a quick release, then pan-sear the bottom layer briefly on the sauté setting or in a hot skillet to develop a crisp edge. Timing and liquid ratios need small adjustments for short-grain rice.
How long should rice rest after cooking before I fluff and serve?
Let rice rest with the lid on for 10–15 minutes after the heat is off. This steaming period evens out moisture, sets the grains, and makes it easier to separate the crispy layer without breaking the rice.
My bottom layer is burnt or too hard—what went wrong?
Burnt or hard spots come from excessive heat, too little liquid, or uneven heat distribution. Lower the heat, add a splash of hot water and cover to soften, and use a heat diffuser or heavier pot next time. Reduce high-moisture add-ins and check your rice-to-liquid ratio.
How can I store leftovers and keep texture for later use?
Cool cooked rice quickly and freeze in portions for best texture; refrigeration makes it dry and crumbly. Reheat frozen portions by steaming or pan-frying directly from frozen for fried rice or to refresh the toasted layer.
What are easy ways to reuse leftover rice with a crispy element?
Make onigiri with a thin toasted crust, or pan-fry chilled rice with oil and soy sauce to create yakimeshi (fried rice) with a pleasant crunch. Press and pan-sear small discs until golden for a quick snack.
Do different dashi options change how the bottom browns?
Dashi types—kombu, awase, or shiitake—alter umami and color but not the basic browning chemistry. Stronger, darker dashi or added soy will brown and caramelize faster, so slightly reduce cooking liquid to avoid over-darkening.