Savor Dango Rice Dumplings: Authentic Japanese Cuisine
Savor Japan

17 min read
I still remember my first bite — warm, slightly charred, and sweet with a hint of soy — and how it felt like a small taste of Kyoto on my kitchen counter.
These skewered treats are beloved for their soft, chewy texture and glossy glaze. They pair comfort and ceremony in one simple mouthful.
In this friendly, step-by-step recipe, you’ll learn how to make three to five balls per skewer, judge the “earlobe” dough feel, and get a reliable shiny sauce that balances sweet and savory.
The classic version comes from a tea house in Kyoto, and modern home cooks often adapt techniques like cast-iron searing and a cold-mixed starch glaze for perfect shine. For a deeper dive into the origin and technique, see this short guide on mitarashi dango.
Key Takeaways
- These skewers offer a satisfying chew and a savory-sweet glaze that makes them craveable.
- You’ll get clear cues for boiling, cooling, skewering, and light charring.
- We compare flours and explain easy substitutions for home cooks.
- Troubleshooting tips cover cracking, rubberiness, and uneven browning.
- Make-ahead and storage notes help keep the treats tender longer.
What are dango rice dumplings? Flavor, texture, and why they’re trending now
Small skewered balls from Kyoto pack a surprising balance of chew, char, and glossy sauce.
Dango are small Japanese dumplings made from glutinous flour that hold sauces and toppings perfectly. The base taste is mild, a hint of japanese rice that lets the glaze take center stage.
The hallmark texture is soft, bouncy, and slightly elastic. That springy chew comes from the right mix of rice flour—ideally shiratamako—and gentle boiling. A quick sear adds a light, nutty char without making them tough.
The flavor profile splits cleanly: the balls themselves are subtly quiet, while the thick sweet soy sauce adds savory depth, glossy shine, and stickiness that clings to every bite.
They’re trending now because anime and travel clips spotlight the snack, and home cooks love easy pantry swaps and cast-iron browning. Most people thread three or four per skewer for even charring, though five remains common in Kyoto.
This is a weeknight-friendly food: simmer until they float, cool briefly, then sear and glaze. Later sections will decode flour labels, substitutions, and a no-lump method for that glassy sauce—see a quick primer on the most popular types for context.
Ingredients for authentic dango at home
Start with a short shopping list: a balanced flour blend, warm water, and a pantry mitarashi sauce. These basics let you make chewy skewers with glossy finish at home.
Rice flours explained: shiratamako, joshinko, and dangoko
Shiratamako comes from glutinous sweet rice and gives bounce and elasticity. Joshinko is milled from regular japanese rice and adds structure and a clean bite.
Use a 50:50 blend for classic texture. Shift to 60% shiratamako and 40% joshinko for a springier, mochi-like chew. Dangoko is a convenient single-bag alternative when you can’t source both flours.

Glaze, tools, and toppings
For the mitarashi: mix sugar, mirin, soy sauce, potato or cornstarch, and water in a cold pan before heating to avoid lumps. Mirin adds shine and umami while starch yields a translucent glaze.
- Core ingredients: blended rice flour, warm water, and a simple mitarashi sauce.
- Tools: large pot, mixing bowl, soaked bamboo skewers, and a cast-iron skillet or broiler (torch optional).
- Optional toppings: anko (sweet red bean paste), kinako with kuromitsu, or a kinako-sugar sprinkle for nutty contrast.
Step-by-step dango rice dumplings recipe (present time)
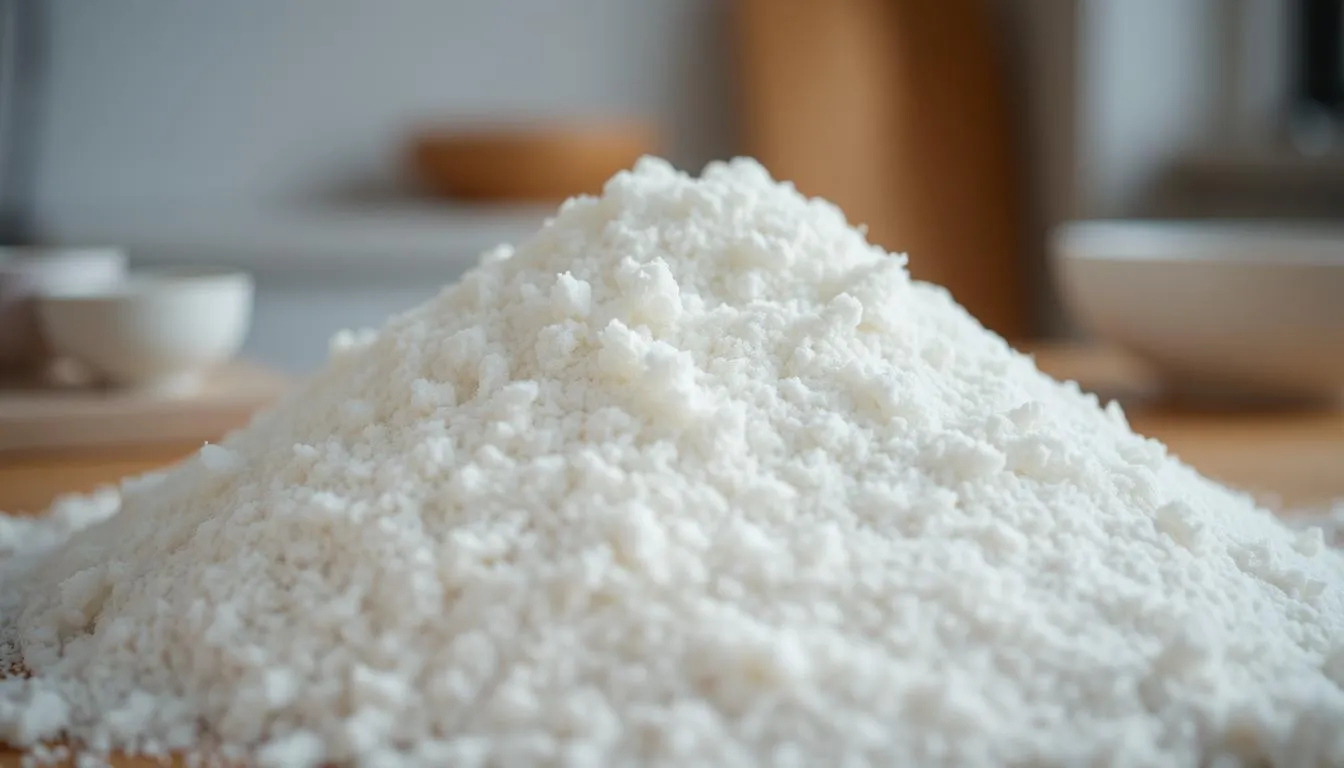
Start by mixing your flours and adding water until the mixture holds together in small, shaggy clumps. Use hot water for a joshinko/shiratamako blend or room-temperature water for dangoko. Work in a bowl so you can see when clumps form.
Hydrate and knead
Transfer the clumps to a clean surface and knead dough until smooth. Aim for an “earlobe” tenderness: soft, elastic, not sticky.
Portion, roll, and boil
- Weigh or divide evenly; roll into uniform balls so each cooks the same.
- Bring a large pot of boiling water to a rolling boil and gently add the balls.
- When they float, cook 1–2 more minutes to ensure the center is done but springy.
Chill, drain, and skewer
Move the cooked pieces to cool water to stop cooking, then drain well. Thread 3–4 per stick, keeping skewers slightly damp to prevent slipping during searing.
“A steady hand while rolling yields even browning and tidy presentation.”
- For a glossy finish, follow the mitarashi guide for sauce ratios: mitarashi guide.
- Small, consistent balls take the same minutes to cook and brown evenly.
Make the mitarashi sweet soy glaze
The right sauce brings glossy shine and balanced sweetness that clings to every bite. Start by measuring ingredients into a cold pan so the starch dissolves fully before any heat. This step is the difference between a glassy finish and a lumpy mess.

Ingredient ratios for a glossy, balanced finish
Whisk together sugar, mirin, soy sauce, water, and your chosen starch in a cold pan. Use a 1:1 sugar-to-water baseline and adjust to taste; more soy sauce reduces perceived sweetness and adds umami.
Cold-mix starch before applying heat
Use potato or kudzu starch for a clearer, more stable gel. Mix the starch into the cold liquid so it fully hydrates. This prevents lumps when you apply heat.
Simmer gently until pourable
Bring the pan to medium, whisking constantly. The mixture will thicken quickly; remove from heat when it is still pourable. It will set more as it cools, so pull it a touch early.
Shine boosters and finishing tips
- Add a little rice syrup or honey for extra shine and body.
- Try a touch of unrefined brown sugar for caramel depth.
- Keep the sauce warm while you brown skewers so the glaze clings easily.
- Taste and tweak in a small bowl—adjust salt or sugar by subtle minutes of simmering.
Shaping, skewering, and browning: techniques for perfect surface texture
How you form and brown each ball determines its final chew and shine. Smooth, crack-free shaping creates an even surface that browns consistently and lets the glaze cling without pooling.
Cast iron sear: quick browning without drying
Preheat a well-seasoned cast iron until it is ripping hot. A quick, high-heat contact locks moisture inside and gives a controlled, toasty color.
Press the skewers gently with a spatula so each piece makes full contact. Flip once; brief searing avoids a hard crust that can toughen the chew.
Broiler vs. grill: when to use each at home
The broiler offers hands-off, even browning but watch for puffing that can deform the dumplings. Thread 3–4 per stick for stability and consistent results.
A grill or shichirin with binchotan gives a clean, aromatic char while keeping smoke low. Soak wooden skewers first to prevent scorching.
Torching and traditional binchotan notes
A handheld torch can add quick color, but avoid heavy, focused passes that bring bitterness. Use light, sweeping motions for subtle char.
- Shape smooth balls with no cracks so the surface browns evenly.
- Skewers should hold 3–4 pieces for balanced browning and serving size.
- Keep browning brief; aim for a kiss of color and toasted flavor before glazing with sauce or glaze.
Flour choices and substitutions: shiratamako, joshinko blend, and more
Different powdered flours create distinct textures: from springy to almost mochi-soft.
 50/50 joshinko and shiratamako gives a balanced bite. The mix yields a bouncy, chewy result that is not overly sticky. Move toward 40/60 (more shiratamako) for extra elasticity if you like a springier mouthfeel.
100% shiratamako makes a softer, very springy ball that many prefer for a pillowy texture. The trade-off is less structure on the skewer, so handle gently when boiling and skewering.
How other flours behave
Mochiko is milled differently and tends to produce a softer, stickier crumb—closer to mochi than the firmer chew some recipes aim for.
Thai glutinous rice flour won’t match the gelatinization of japanese glutinous rice flours. Expect different elasticity and slightly altered cooking cues.
- Dangoko is a practical one-bag solution for home cooks; it often yields a firmer chew due to blended ratios.
- Adjust ratios by small test batches: more shiratamako = more spring; more joshinko = cleaner bite.
- Check labels and source shiratamako, joshinko, or dangoko at Japanese markets or online.
“Trust the dough feel and cooking signs over brand names when substituting.”
Serving ideas and variations
A few thoughtful garnishes make skewers shine for tea time, winter desserts, or a festival-style spread.
Mitarashi with a glossy finish
Brush hot skewers with the classic mitarashi glaze for the sweet‑savory contrast that defines this style. Serve on a warm plate so the sauce stays fluid and glossy.
Anko-topped skewers for sweet red bean lovers
Spoon smooth or chunky anko—classic red bean paste—over warm skewers for a plush, sweet red bean counterpoint. The sweet topping highlights the subtle rice base without overpowering it.
Kinako and kuromitsu: nutty and caramel notes
Dust with kinako and drizzle kuromitsu for a toasty, caramel edge. A light sprinkle of toasted sesame adds aroma and visual contrast.
Seasonal pairings and serving ideas
Build a dessert bowl with shiratama, fruits, jelly, and syrup for an anmitsu-style treat. Pair skewers with hot green tea for a classic, balanced tea-time combo.
In winter, toast pieces and nestle them into oshiruko (sweet red bean soup) for a warm, comforting bowl.
“Mix and match toppings—some with anko, some glazed, some kinako—so everyone finds a favorite.”
| Topping | Flavor | Best served with |
|---|---|---|
| Mitarashi glaze | Sweet‑savory, glossy | Warm, on a heated plate |
| Anko (red bean paste) | Rich, sweet red bean | Paired with green tea or as a dessert topping |
| Kinako + kuromitsu | Nutty, caramel | With toasted sesame for crunch |
| Oshiruko add‑in | Comforting, sweet | Toasted pieces slipped into warm soup |
- Serve hot skewers brushed with glossy mitarashi for the quintessential experience.
- Spoon anko over warm skewers to highlight the bean paste and gentle rice flavor.
- Mix and match half the batch to offer variety at gatherings or festivals.
Make-ahead, storage, and reheating tips
Small planning keeps skewers tender and glossy when you serve. Add a bit of sugar to the dough—about 20% of the flour weight—to slow firming and extend softness for several hours.
Keeping them soft longer
Mix sugar into the dough so the starches retrograde more slowly. That simple step helps the balls stay pillowy without changing flavor.
Short-term storage
Keep skewers in an airtight container at room temperature for up to about 6 hours. For longer hold, refrigerate up to 24 hours, but plan a quick reheat to restore bounce.
Freezing and best reheating methods
Freeze either raw, shaped pieces in a single layer (boil from frozen) or cooled, cooked pieces spaced so they don’t stick.
- Reheat briefly in the microwave or dip in hot water for a few minutes to revive texture.
- Store leftover glaze in the fridge 2–3 days or freeze it; add a splash of water and warm gently until pourable.
- Use containers that keep pieces separate to avoid tearing during thawing or heating.
“Time your boiling, browning, and glazing close together for the best shine and chew.”
Troubleshooting common issues
Small kitchen hiccups happen fast, but most are easy to fix in a few minutes.
Dough cracks while shaping
If the dough cracks, it’s usually too dry. Knead in 1–2 teaspoons of water at a time until the mix feels like a soft earlobe.
Keep portions even and smooth to avoid splits during boiling and skewering. If the dough feels sticky, dust lightly with rice flour rather than adding regular flour.
Dumplings turn tough or rubbery after grilling
Tough results come from low heat or overcooking on the pan. Preheat a cast-iron skillet until very hot, then sear briefly.
Short, high-heat contact locks moisture inside and preserves a tender internal texture.
Uneven browning on the pan
Splotchy color means not all surfaces touch the pan. Press skewers gently so each ball’s surface makes full contact.
Thread 3–4 per stick for stability and flip once for even minutes of searing.
Glaze turns pasty or lumpy
A pasty glaze often comes from too much starch or over-reduction. Thin with a splash of water and reheat while whisking until shiny and pourable.
Prevent lumps by dissolving starch in the cold liquid before any heat and whisking continuously once warmed.
“Fix small issues early—adjust water, raise the heat, or rescue the sauce—so your final plate stays glossy and tender.”
| Problem | Likely cause | Quick fix |
|---|---|---|
| Cracked dough | Too dry | Knead in 1–2 tsp water; reach “earlobe” feel |
| Tough after grilling | Low heat or over-sear | Use very hot pan; sear briefly |
| Uneven browning | Surface not contacting pan | Press skewers; use 3–4 pieces per stick |
| Pasty/lumpy glaze | Too much starch or over-reduced | Whisk in water and reheat; dissolve starch cold next time |
Time, yield, nutrition, and equipment at a glance
Timing matters—follow the minutes listed here for consistent texture and brilliant shine. This section gives a quick snapshot so you can plan prep, boiling, sear, and glaze without guessing.
Total time, active time, and minutes to boil
Expect a streamlined session: total time is under an hour for most cooks, with active time usually under 30 minutes.
Boil the balls until they float, then cook another 1–2 minutes to ensure the center is tender. Those extra minutes make a big difference.
Yield per batch and typical skewer count
A common home yield is about 16 pieces per batch. Thread 3–4 pieces per skewer for stable browning and a neat serving size.
Essential equipment checklist for home cooks
- Large pot for boiling — use ample water so pieces circulate freely.
- Mixing bowl for dough and a second bowl for cooling or holding cooked pieces.
- 4–6 bamboo skewers and a 10-inch cast iron skillet for quick searing.
- Spatula and whisk for the sauce, plus a small pan to thicken glaze while you brown.
Quick workflow: mix and knead, boil until floating + 1–2 minutes, chill and drain, sear, then glaze.
| Item | Typical count or time | Notes |
|---|---|---|
| Total active time | Under 30 minutes | Fast batches work well for weeknights |
| Yield | ~16 pieces | Fits 3–4 per skewer |
| Nutrition per serving | 120–190 kcal | Low fat, modest protein; glaze adds sugar and sodium |
| Key gear | Pot, bowl, skillet, skewers | Have a second pan ready for sauce |
Conclusion
** Nail the chew, add a brief char, and glaze while hot for true mitarashi dango.**
Keep the flour balance and trust the dough feel. A joshinko–shiratamako blend gives structure and bounce, or choose 100% shiratamako for extra spring. Boil until pieces float, then cook 1–2 more minutes for a tender interior.
Brown quickly over high heat so the surface gets a kiss of color. Brush warm sauce right away so the glossy finish clings to the balls and skewers.
Use the troubleshooting tips if the dough cracks or the sauce thickens too much. With a simple pantry, clear timing, and small tweaks to sweetness or texture, this recipe fits weeknights and gatherings alike—make it yours.
FAQ
What is the best flour to use for authentic chewy dango?
For that classic chew, use shiratamako or a blend of shiratamako and joshinko. Shiratamako gives the soft, elastic texture; joshinko adds structure. If you can’t find them, Thai glutinous rice flour or mochiko can work but will yield a slightly different bite.
How do I hydrate the flour for perfect dough?
Use hot or warm water and add it gradually while mixing until the dough reaches a smooth, slightly tacky feel—often called “earlobe” tenderness. Knead briefly on a lightly floured surface until elastic but not sticky.
Can I fill or top the balls with sweet red bean paste?
Yes. Sweet red bean paste (anko) is a classic filling or topping. For filling, chill slightly firmer anko so it holds shape. For topping, brush the skewers with glaze first, then add a dollop of paste or pipe it on.
How long should I boil them to cook through without getting rubbery?
Boil until the pieces float, then cook 1–2 minutes more. Avoid overcooking; extended boiling makes them tough. Immediately transfer to cold water to stop cooking and maintain a tender texture.
What’s the simplest way to make mitarashi glaze at home?
Combine soy sauce, mirin, sugar, water, and a little starch. Mix the starch with cold liquid first to prevent lumps, then simmer gently until the mixture thickens to a glossy glaze. Adjust sweetness and salt to taste.
How do I get a nice browning without drying out the surface?
Quickly sear on a hot cast iron skillet or use a grill/broiler for short bursts. Keep heat high and time short, rotating skewers to brown evenly. Brushing lightly with glaze during browning helps retain moisture and adds shine.
Can I make the dough ahead of time and store it?
Yes. You can refrigerate shaped balls for a short time or freeze before cooking. If refrigerating the dough, wrap tightly to prevent drying. Thaw frozen pieces before boiling and expect a slight texture change.
Why does my dough crack while shaping and how do I fix it?
Cracks mean the dough is too dry. Add a teaspoon of warm water at a time and knead until smooth. Let the dough rest, covered, for 10–15 minutes to relax the gluten-like structure and reduce cracking.
What causes uneven browning on the pan or grill?
Uneven heat, overcrowding, or inconsistent oiling cause patchy browning. Use steady high heat, space skewers apart, and preheat the pan or grill. Rotate skewers for uniform color and apply glaze in thin layers.
How do I prevent the glaze from becoming pasty or lumpy?
Mix starch into cold liquid before adding heat and stir constantly while simmering. Keep heat moderate; rapid boiling can break the emulsion. If it gets too thick, whisk in a little warm water to restore shine.
What are helpful tools for making these at home?
A small pot for boiling, heatproof bowl, wooden spoon, skewers, a cast iron skillet or grill for searing, and a small saucepan for glaze are ideal. A kitchen scale and measuring cups help maintain consistent texture and yield.
How many pieces will a typical batch yield and how long does it take?
A standard batch (about 1–2 cups flour) yields enough for 8–12 skewers, three to four balls each. Total time is roughly 40–60 minutes including hydration, shaping, boiling, and glazing; active hands-on time is shorter.