Discover the Best Mochi Ice Cream Flavors
Discover the best mochi ice cream flavors with our expert guide. Learn how to choose and enjoy this unique dessert at home
14 min read
I still remember the first time I bit into a tiny, chewy shell that gave way to a burst of cold sweetness. That moment hooked me, and it’s why I love sharing simple, joyful kitchen projects that fit into busy weeknights.
This treat pairs a tender sweet rice dough with a chilled scoop inside, offering a fun contrast of texture and temperature in every bite. Home cooks often use sweet rice flour like Mochiko or shiratamako and cook the dough in short microwave bursts until it turns slightly shiny.
We’ll preview how to match cutter size to your scoop, freeze pieces seam-side down, and dust surfaces with cornstarch or potato starch to prevent sticking. Expect tips on popular flavors—from classic vanilla and chocolate to matcha and ube—and quick fixes for tearing, melting, or over-sticky dough.
By the end of this article, you’ll know what to expect before trying the recipe, and you’ll feel ready to make a batch that looks and tastes great.
Key Takeaways
- Sweet rice dough plus a chilled scoop creates a signature chew-and-cool contrast.
- Use sweet rice flour and microwave in short bursts for best dough texture.
- Match cutter size to scoop and freeze seam-side down to set shapes.
- Dust with cornstarch or potato starch to reduce sticking and tearing.
- Beginner-friendly process with simple tools and clear troubleshooting tips.
Why Mochi Ice Cream Is Having a Moment in the U.S.
Grocery shoppers now spot colorful, single-serve rice-wrapped desserts in big-box freezer cases, and that visibility has changed how Americans try and buy treats.
Variety packs at warehouse clubs and supermarkets sped adoption. Families buy multi-flavor boxes, taste several at once, then often try a homemade recipe that uses store-bought ice cream and sweet rice flour.
Social platforms amplify the appeal. Short videos highlight the chewy texture next to cold ice and fun colors, making these bites feel new even to seasoned dessert fans.
Convenience matters: grab-and-go boxes or a quick batch made in minutes with an ice cream scoop and simple wrap steps lower the barrier to entry.
- Single-serve format is shareable and snackable.
- Flavor variety keeps repeat purchases high.
- At-home versions let people customize size, filling, and color.
What Is Mochi Ice Cream and How Does It Work?
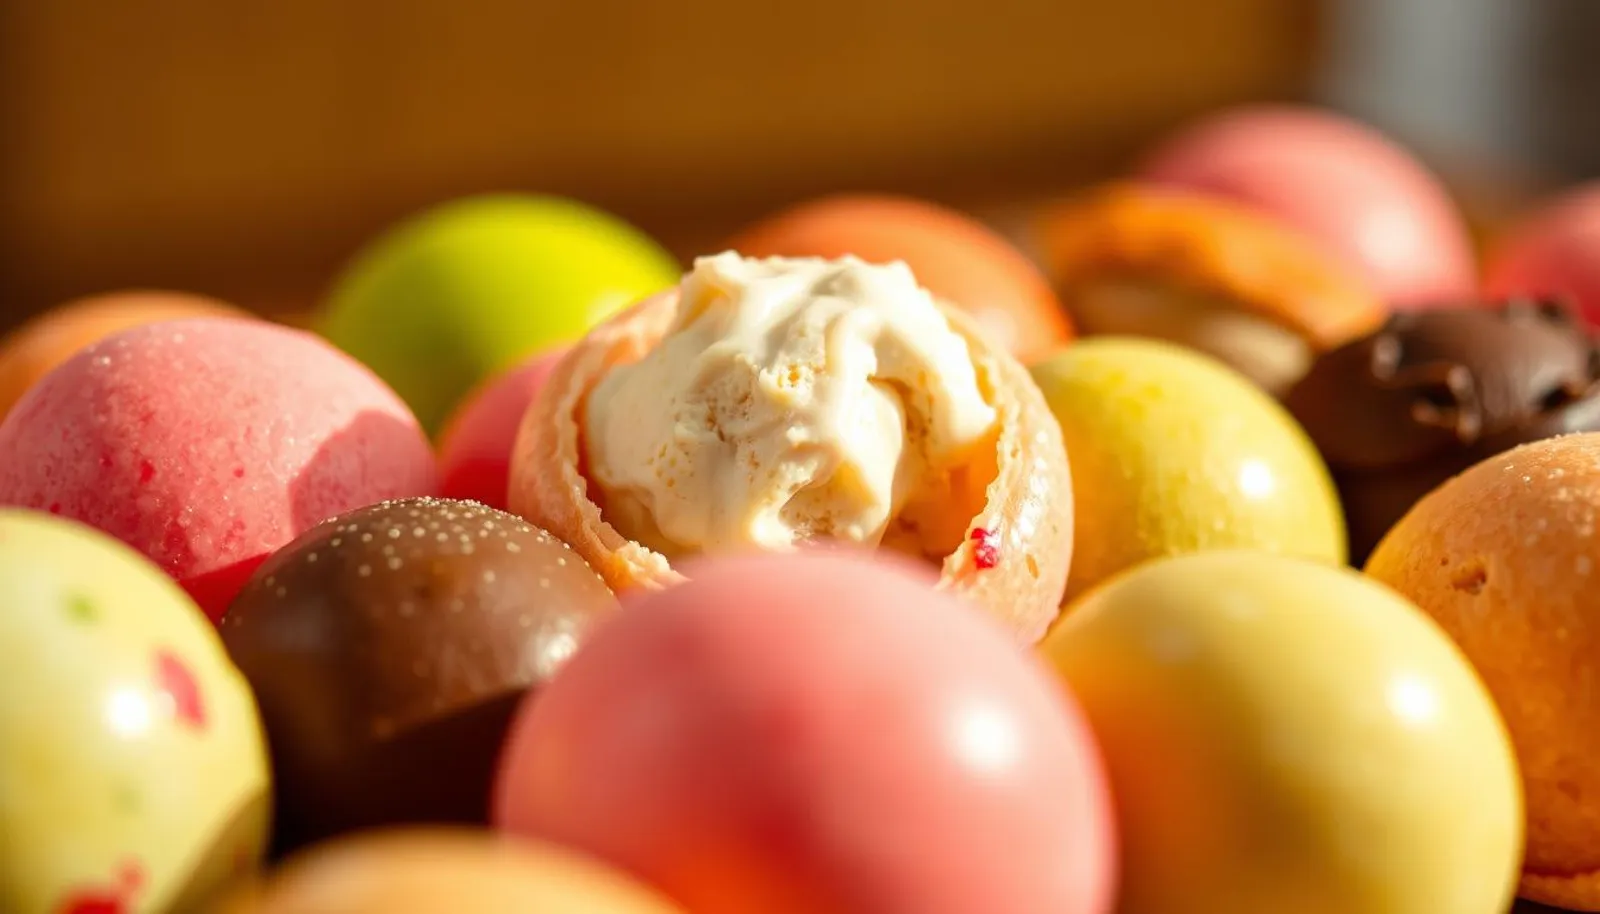
A quick look at this treat shows how sticky rice transforms into a tender, chewy shell that hugs a frozen center.
Mochi 101: From glutinous rice to chewy rice cake
Mochi began as steamed glutinous rice that was pounded in a ritual called Mochitsuki to make a soft rice cake. Today, home cooks often use sweet rice flour like Mochiko or shiratamako as a shortcut.
“Traditional pounding creates the texture, but the flour method captures the same chew with far less effort.”
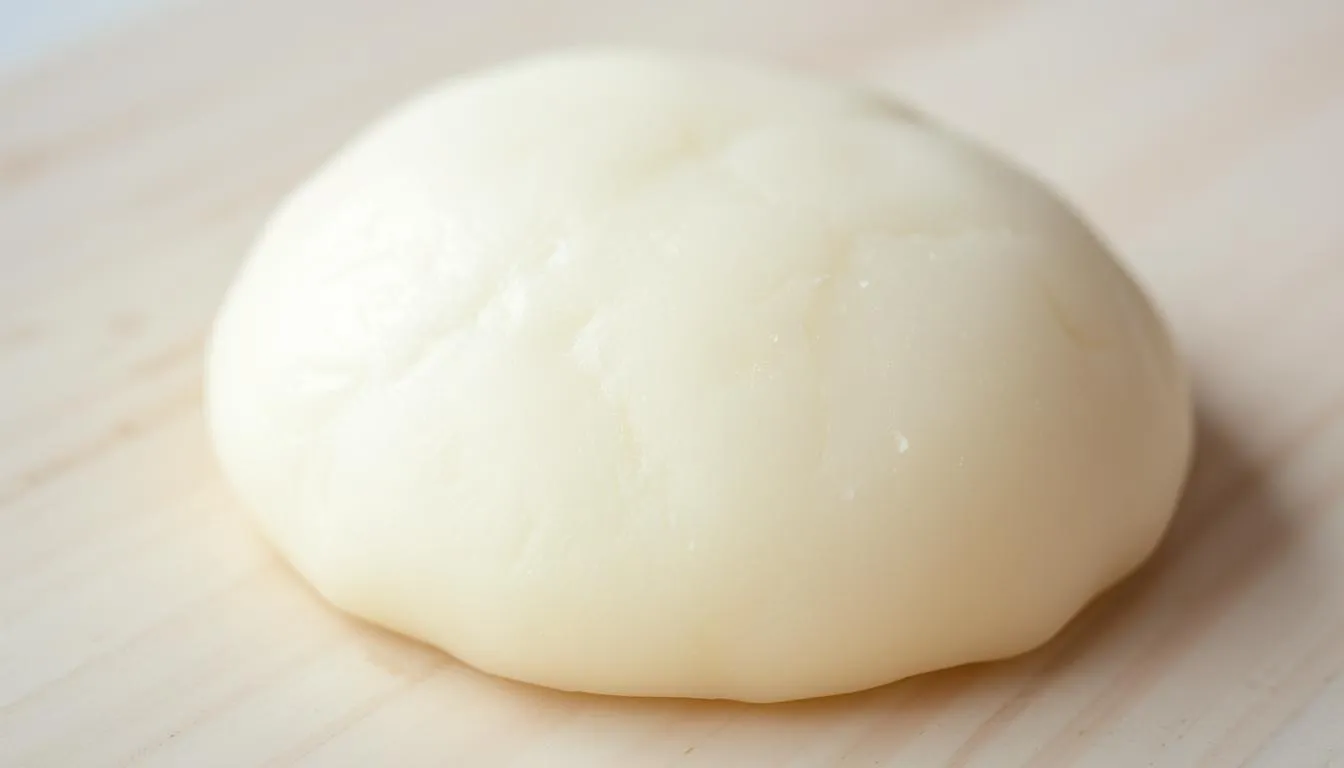
The sweet rice dough around frozen filling: texture, balance, and bite-size joy
The simple dough mix—sweet rice flour, sugar, and water—cooks quickly in a microwave-safe bowl. Short bursts and folding with a damp spatula turn the mix shiny and stretchy.
The stretchy dough cushions the frozen center so a small bite stays soft, not brittle. A light dusting of starch keeps the surface workable and prevents tearing while sealing a neat, bite-size cake.
| Method | Key Steps | Result |
|---|---|---|
| Traditional Mochitsuki | Steam glutinous rice, pound | Deep chew, ceremonial texture |
| Home flour method | Mix sweet rice flour, microwave, roll | Quick, stretchy dough for mochi ice cream |
| Tools to use | Mixing bowl, plastic wrap, wet spatula | Safe handling and neat wraps |
Gather Your Ingredients and Tools for mochi ice cream
Gathering the right flour, starch, and tools first saves time and keeps the process calm.
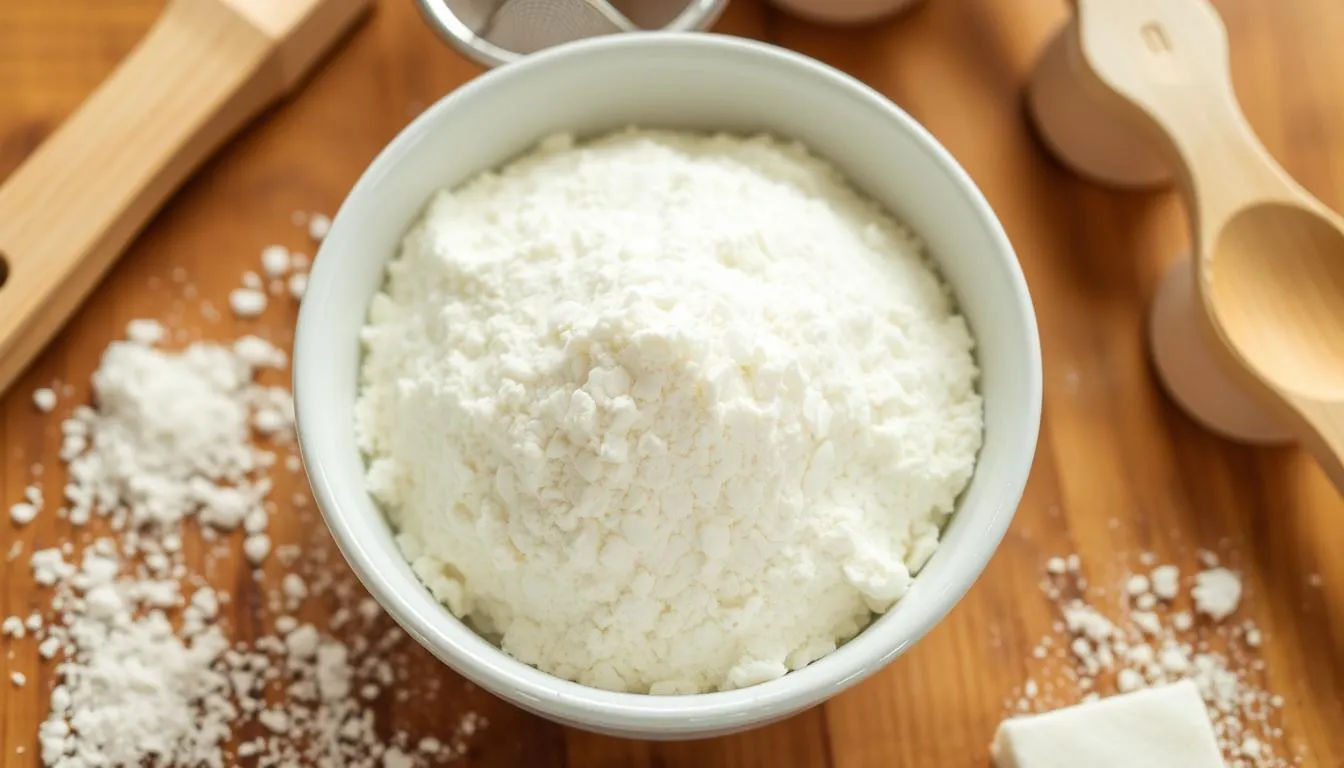
Core ingredients
Glutinous rice flour—choose Mochiko or shiratamako—plus sugar and water form the base for soft mochi dough. Regular rice flour won’t give the same chew, so use the correct sweet rice flour for best results.
Starch to prevent sticking
Keep cornstarch or potato starch nearby to cornstarch prevent sticking. Dust the top of your work surface and tools so the dough slides easily while you roll and cut.
Helpful tools
Have a microwave-safe bowl, a rubber spatula, plastic wrap, parchment, rolling pin, and a 3–3¾ inch cutter. An ice cream scoop and a small sheet pan help portion and chill the filling in the freezer.
Pre-measure sugar and water, transfer the dough bowl onto parchment when ready, and plan a short chill of about a half minute—actually about thirty minutes—to firm the top so cuts come clean and handling is easier. Store finished pieces in an airtight container for neat stacking.
Step-by-Step: Make Mochi Ice Cream at Home
Firm, frozen scoops make wrapping simple and keep the center from melting. Line a tray with parchment and use an ice cream scoop to portion tight ice cream balls. Freeze the tray for about 1 hour so the filling is solid and easy to handle.
Microwave method (quick)
Combine sweet rice flour, sugar, and water in a microwave-safe bowl. Cover with plastic wrap and microwave 1 minute, stir with a wet spatula, repeat for another minute, then microwave 30 seconds until slightly shiny.
Optional steaming method
For a classic texture, steam the mix about 15 minutes, stir, then steam 5 more minutes until translucent and sticky. Both methods yield a cohesive mochi dough ready to work.
Roll, cut, wrap, and freeze
Dust parchment with starch, turn the dough bowl onto it, and dust the top dough. Roll to roughly 1/4 inch and chill about 30 minutes to make cutting cleaner.
- Use a 3–3¾ inch cutter to cut circles dough that match your scoop size.
- Brush off excess starch, place one frozen scoop in the center, and bring edges up around ice cream to pinch and seal.
- Place each piece on plastic wrap, twist to secure, set seam-side down, and freeze at least 1–2 hours before serving.
Pro tip: Work one piece at a time and keep extra scoops frozen. A calm, steady pace helps you make polished treats that hold shape and taste fresh.
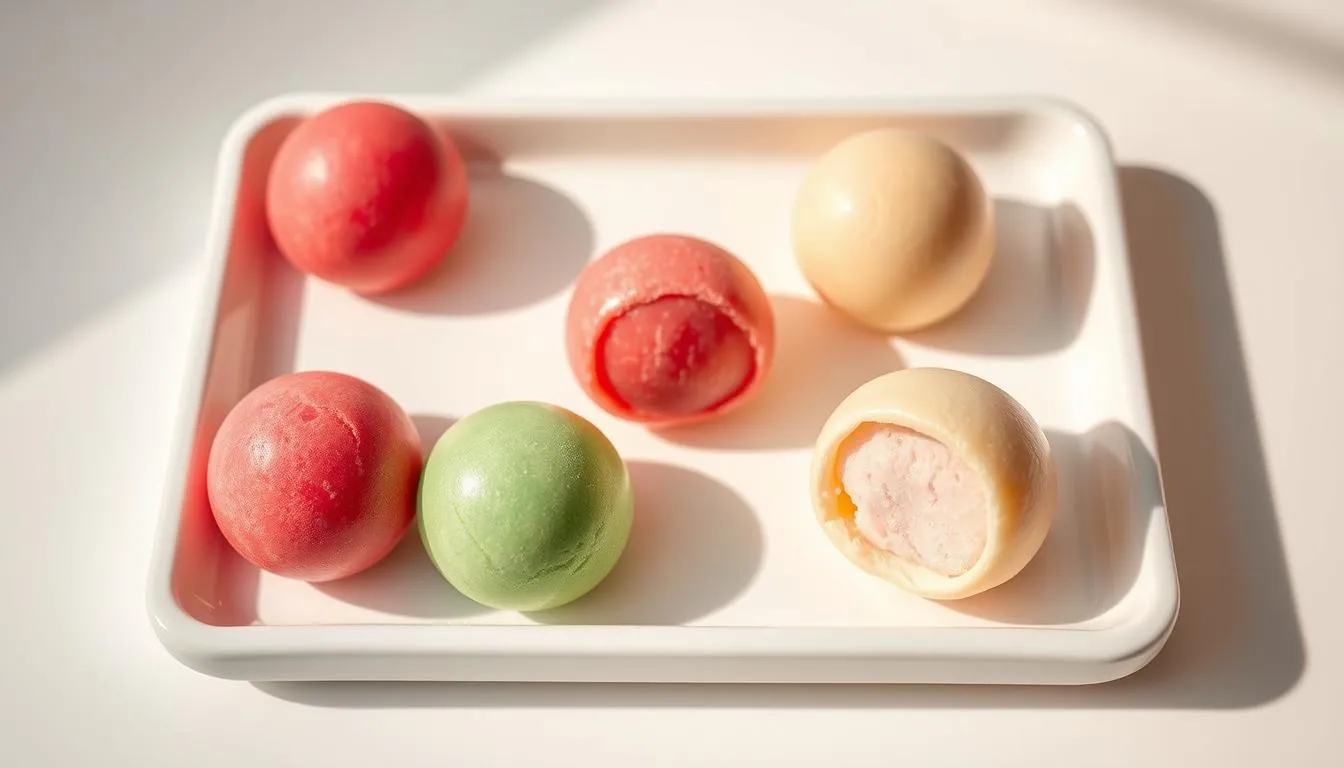
The Best Mochi Ice Cream Flavors to Try First
Start with a short list of fail-proof flavors that show off the chewy shell and frozen center.
Classic picks work because they balance sweetness and texture. Try vanilla, chocolate, matcha, and strawberry. These let the sweet rice flour and glutinous rice flour dough shine without masking the filling.
Adventurous choices add color and surprise. Ube, coconut, peanut butter, or sorbet bring new aromas and brightness. Sorbet makes a refreshing mochi ice for citrus or berry lovers.
Flavor the dough by stirring in cocoa, matcha powder, vanilla extract, or coconut milk before cooking. This creates subtle, even notes across the whole bite.
- Keep the ice cream center balanced—pair bold fillings with a neutral dough or vice versa.
- Match cutter size to your scoop so the circles dough wrap neatly around ice cream without thick overlaps that freeze too firm.
- Freeze flavored batches well so the seal holds and the center stays pleasantly chewy.
Shaping, Sealing, and Wrapping Like a Pro
Start small and steady: good finishes come from correct sizing and calm hands.
Right size matters. Use a round cutter about an inch larger than your ice cream scoop so the dough hugs the filling without extra bulk. Cut circles dough from the rolled sheet and keep the top dusted with starch.
Seal with care. Brush off excess starch from the top before placing the frozen ball in the center. Bring the edges up evenly around ice and pinch gently to form a smooth seam.
If the mochi dough feels tight, pause a moment to let it relax. Resume sealing slowly to avoid tearing. Wrap each piece in plastic wrap and set seam-side down in the freezer to hold shape.
Quick tips for tidy results
- Keep only one portion out at a time to protect the ice cream center.
- Use an egg carton to cradle pieces hands-free while they firm up.
- Check the finish: the surface should be smooth with no large folds for a clean bite through mochi and into the ice cream center.
| Task | Action | Why it matters |
|---|---|---|
| Choose cutter | ~1 inch larger than scoop | Prevents excess dough and keeps shape balanced |
| Remove starch | Brush top before sealing | Helps seam bond and avoids a powdery bite |
| Wrap & freeze | Plastic wrap, seam-side down | Maintains round top and neat presentation |
Troubleshooting and Pro Tips for Flawless Results
When the dough misbehaves, calm, small changes to heat, dusting, and handling usually solve it fast. These tips help you fix sticky surfaces, adjust cook time, and clean up safely without losing momentum.
Taming stickiness: Dust top dough, the work surface, and tools with cornstarch to prevent sticking or use potato starch for a smoother finish. Brush off excess before wrapping to avoid a chalky bite.
Microwave timing: Ovens differ, so adjust the microwave in 30-second increments until the mochi dough looks slightly shiny and cohesive. Count total minutes, then stop, stir, and test with a wet spatula.
“Keep a small cup of water nearby to wet your spatula—this prevents tearing and keeps handling clean.”
- Use mitts and lift plastic away from your face; the bowl can trap steam.
- Work one portion at a time to limit bench time and stop the ice cream center from melting.
- Soak the bowl and spatula right after rolling; a short soak loosens residue so cleanup takes minutes.
- If seams won’t seal, brush away excess starch, then pinch again for a clean join.
Serving and Storage: From Freezer to Dessert Plate
Letting your treats rest a few minutes after freezing brings back the chewy texture while keeping the center pleasantly cold. After you freeze each piece seam-side down for at least 1–2 hours, set them on a cool surface for a brief pause before serving.
Resting before you serve
Wait just a few minutes. This softens the outer layer so each bite yields a gentle chew without the filling melting. Encourage guests to take one at a time so pieces stay at ideal texture.
Wrap, store, and keep quality
Keep each piece tightly wrapped in plastic wrap and place groups into an airtight container to limit frost and common freezer odors. Label the container with a date so you can rotate stock.
- Frozen shelf life varies: many prefer to eat within a week or two for best texture; some sources store up to 3 months when individually wrapped and bagged.
- If ice cream balls fused together, let the container rest a minute, then separate gently to avoid tearing the outer shell.
- Before plating, brush off excess rice flour dust for a clean finish and better mouthfeel.
“Keep pieces tightly wrapped and return them to the freezer quickly after serving to prevent freezer burn and preserve flavor.”
| Step | Why it matters | Tip |
|---|---|---|
| Freeze 1–2 hours | Sets the seal and firms the center | Place seam-side down on a tray |
| Wrap + container | Prevents frost and odor transfer | Use plastic wrap, then store in an airtight container |
| Rest a few minutes | Returns chew without melting the center | Serve on a cool plate |
Conclusion
Finish with confidence: the simple recipe — sweet rice flour (Mochiko or shiratamako), sugar, and water cooked in short microwave bursts — gives you a shiny, stretchy dough in minutes.
Roll, cut, place a frozen scoop, seal seam-side down, and wrap in plastic wrap. Chill until firm.
Flavor freely with chocolate, matcha, vanilla, or coconut and keep a small toolkit (a damp spatula, a sharp cutter, and spare plastic) handy to speed work. Store pieces well-wrapped; best texture is enjoyed within days, though they keep longer if sealed tight.
You now have a clear path to make mochi ice cream at home — a few focused steps bring a chewy, cool, cake-like bite to your table.
FAQ
What is the basic difference between sweet rice flour types like Mochiko and shiratamako?
Mochiko (sweet rice flour) is milled slightly differently than shiratamako, giving shiratamako a smoother, more elastic dough ideal for wrapping frozen treats. Both make a chewy rice dough when mixed with water and sugar, but shiratamako often yields a silkier texture for bite-size desserts.
How do I prevent the dough from sticking while I roll and cut circles?
Dust your work surface and cutter with cornstarch or potato starch, and keep a small bowl of starch nearby to re-dust the dough and tools. Plastic wrap and parchment help for rolling, and lightly dusting the top of the dough keeps it manageable when you cut circles for wrapping around frozen balls.
Can I use the microwave method to make the dough, and what timing works best?
Yes. Cover the bowl with plastic wrap and cook in short bursts—start with 30 seconds, stir with a wet spatula, then repeat in 20–30 second increments until the dough turns slightly shiny and pulls together. Adjust times based on your microwave wattage to avoid overcooking.
What’s the easiest way to shape and seal the dough around frozen balls?
Match your cutter size to the ice cream scoop to avoid extra dough. Place a frozen ice cream ball on a dough circle, pinch the seam to seal, then wrap the finished piece in plastic wrap seam-side down and return to the freezer to firm up.
Should I freeze the ice cream balls before wrapping, and for how long?
Freeze scooped balls on a lined tray until very firm—usually 1–2 hours or overnight. Firmer centers make clean shaping and wrapping easier and reduce melting when you work with the dough.
Can I flavor the wrapper dough, and what ingredients work best?
Yes. Add cocoa powder, matcha, or a bit of vanilla extract and coconut milk to the dough for extra flavor. Keep the liquid ratio steady so the dough stays pliable; small additions give noticeable flavor without altering texture too much.
What’s a good substitute if I don’t have cornstarch to prevent sticking?
Potato starch works well as a substitute to dust surfaces and tools. It prevents sticking similarly and yields a smooth finish on the dough when rolling and cutting circles.
How long can I store finished pieces and what containers are best?
Wrap each piece in plastic wrap and store in an airtight container in the freezer. Consume within 1–2 weeks for best texture and flavor. Use a flat, rigid container to avoid squashing the dessert balls.
Any tips for cleanup and handling hot dough after microwaving?
Soak bowls and utensils right away to loosen sticky rice flour residue. Use oven mitts or a towel when handling hot bowls, and stir with a wet spatula to keep the dough from sticking to tools while it cools enough to handle.
How do I adapt the process for a more traditional steamed dough method?
Mix the sweet rice flour, sugar, and water, then steam the mixture in a heatproof bowl for about 10–15 minutes until it becomes translucent and stretchy. Let it cool slightly, dust with starch, roll thin, cut circles, wrap frozen scoops, and freeze to set.
Are sorbet or non-dairy fillings possible with this wrapper technique?
Absolutely. Sorbet and non-dairy scoops—like coconut milk-based frozen desserts—work well. Keep fillings very cold and firm before wrapping to reduce melting; the starch-dusted dough handles slightly different fillings with the same wrapping steps.
Why might my dough be too tough or too sticky, and how do I fix it?
Too tough can mean too little water or overcooking; add a teaspoon of water and knead gently. Too sticky often means undercooked or too much water—dust generously with starch and microwave or steam a bit more in short intervals until workable.
How do I choose the right scoop size and cutter for consistent pieces?
Match the diameter of your ice cream scoop to the cutter so the dough circle covers the frozen ball with minimal excess. This reduces waste and makes sealing easier, producing uniform, professional-looking portions.