How to Make Crispy Rice: Simple Steps & Tips
Learn how to make perfect crispy rice with our simple recipe. Discover tips and tricks for achieving the crispiest results every time.
15 min read
How to Make Crispy Rice: Simple Steps & Tips
I still remember the first time I turned leftover grains into a crackling snack that stopped a room. That small moment made me curious about the little techniques that change texture and bring joy to a meal.
This guide will help you make crispy rice at home with clear, friendly steps. You’ll learn a reliable way to press cooked sushi into an 8-inch pan to a 1/2-inch thickness, chill it until firm, and pan-fry about 4 minutes per side for a golden finish.
We cover seasoning, including a quick rice vinegar and sugar touch for sushi, and why weighing down the slab helps tidy cuts and better crisping.
Expect simple cooking cues, ingredient notes, and three methods—pan, oven skillet, and sheet-pan—so you can pick the right approach for your kitchen and timeline.
Key Takeaways
- Press cooked rice to 1/2-inch and chill so it holds shape.
- Season sushi with rice vinegar and sugar before pressing.
- Pan-fry about 4 minutes per side until golden and salt generously.
- Weigh the slab for cleaner cuts and better crisping.
- Choose a method—stove, oven skillet, or sheet-pan—to fit your meal plan.
Why Crispy Rice Is the Best Way to Level Up Leftover Rice Today
With one smart step you can transform plain cooked grains into a golden, snackable dish. Pressing or spreading day-old rice and hitting it with high heat gives you a restaurant-level finish without drama. Sheet-pan batches take about 25–35 minutes at 425°F to turn day-old basmati into crunchy, golden bits. A skillet route rescues too-wet rice by baking at 400°F in two stages with buttered onions and zucchini for a crisp-bottomed side.
Why this works: drying and hot contact create that light, snappy crust. It’s the fastest way to add texture to weeknight meals and scales easily for a crowd.
- Give leftovers new life: yesterday’s pot becomes a restaurant-style dish with little effort.
- Flexible: the method handles slightly wet or clumpy rice and turns mistakes into flavor.
- Hands-off oven minutes let you prep the rest of the meal.
Ready to make crispy rice? This simple technique is a reliable, budget-friendly way to stretch ingredients and deliver a craveable side every time.
Ingredients & smart substitutions for crispy results
The right grains, fats, and seasonings set you up for success before heat ever touches the pan.
Choose the grain:
- Pick sushi rice when you want tidy, pan-pressed cakes—its short-grain starches bind and fry evenly.
- Use jasmine for skillet-baked veggie versions; it offers a fragrant, tender bite.
- For sheet-pan batches, basmati’s long grains toast and separate beautifully when tossed with flavor before baking.
Fats and flavor
Pair neutral oil with a bit of butter. Oil raises the smoke point and browning; butter adds finish and richness.
Seasoning and technique
Season hot rice with rice vinegar and sugar so grains absorb flavor. Use correct water ratios and keep the lid on while it cooks—no peeking.
“Salt generously after frying or baking; crunch dilutes saltiness, so be bold.”
Smart swaps: olive oil for butter, zucchini for mushrooms, or plain salt and sugar if you lack rice vinegar. When shopping the grocery store, look for “sushi rice” on the label. For a serving idea, try this crispy rice salad.
Essential equipment: pan, sheet, and cast iron
A few reliable tools make the process repeatable and stress-free. They control surface contact and heat so you get even browning and clean releases.
Nonstick skillet or cast iron for even heat
Use a large nonstick skillet for pan-frying cakes so they sizzle gently and lift cleanly. A cast iron or heavy enameled braiser gives steady, powerful heat for a crunchy bottom in oven methods.
Baking sheet and parchment for sheet-pan batches
For big batches, pick a rimmed baking sheet lined with parchment. Spread the rice thin for faster evaporation and easy tossing.
- Preheat pans until oil shimmers for immediate sizzle.
- Press slabs with a flat pan for tidy cuts.
- Wide spatulas protect edges when flipping.
- Don’t overcrowd; leave space for browning.
| Tool | Best use | Benefit |
|---|---|---|
| Large nonstick pan | Stovetop cakes | Releases cleanly; deep browning |
| Cast iron braiser | Oven-skillet bake | Even, high heat for a crust |
| Rimmed baking sheet | Sheet-pan method | Thin spread, fast baking and easy cleanup |
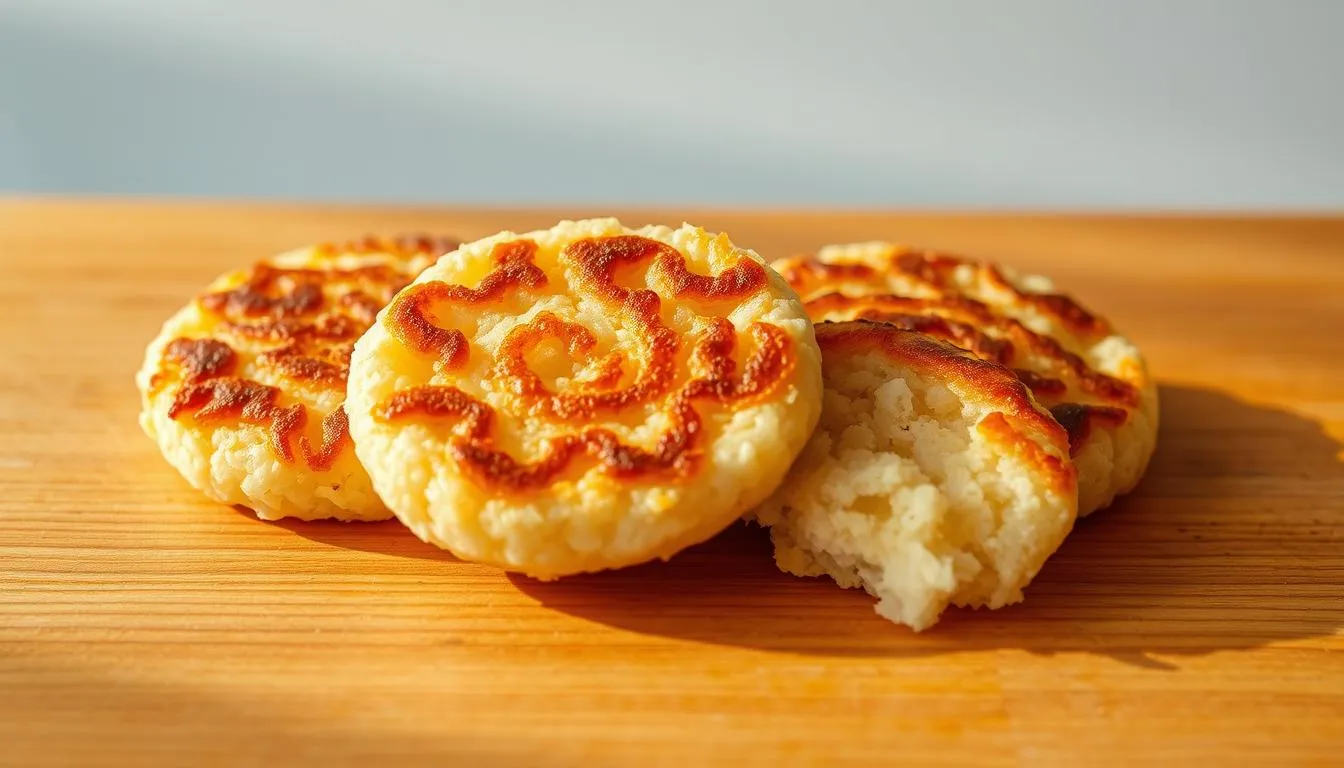
crispy rice (pan-pressed, Nobu-style cakes)
Turn warm sushi into neat, pan-pressed cakes that hold up under bold toppings.
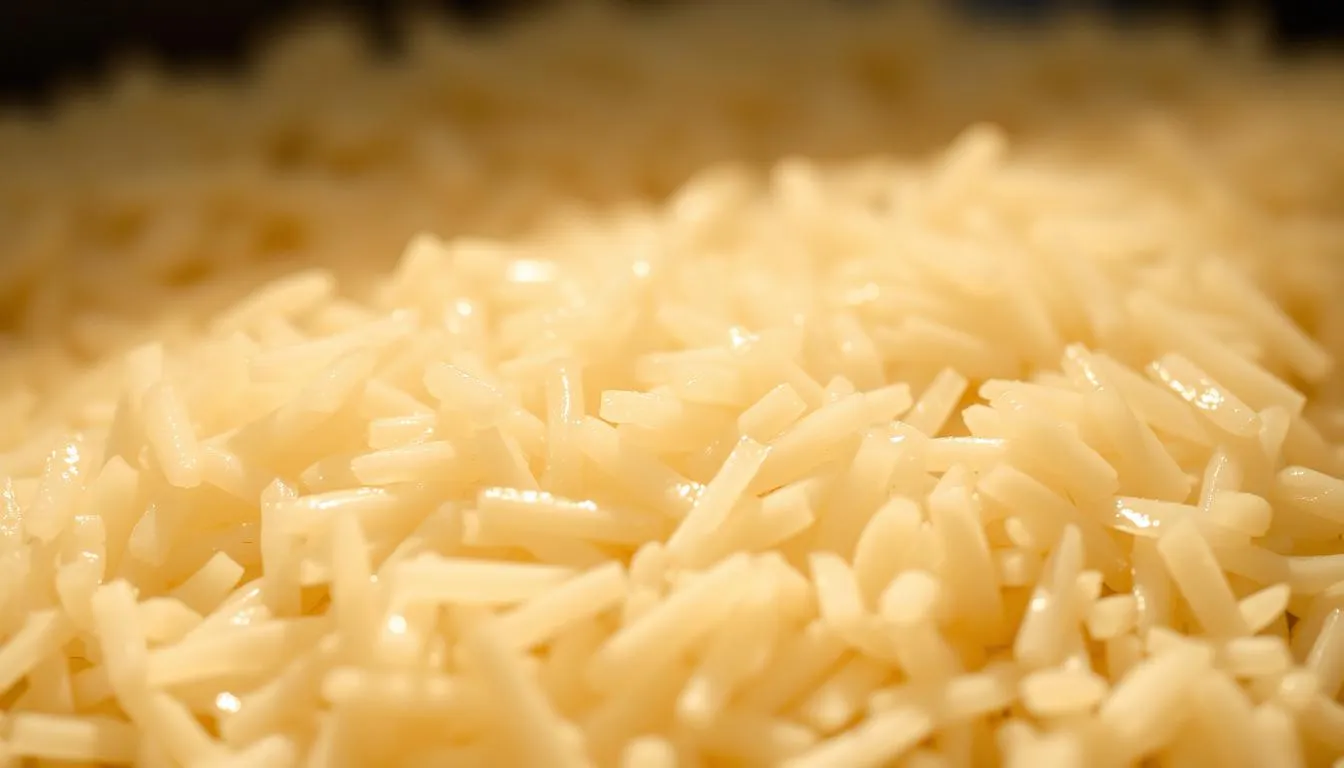
Cook the sushi rice with the correct water ratio, keep the lid on, and let the pot rest 10 minutes so steam finishes the job. While the grains are hot, dissolve rice vinegar and sugar, then fold gently so each grain shines.
Line an 8-inch pan with parchment and press the seasoned sushi rice to a 1/2-inch thickness. Cover and press very firmly. Place a second pan on top and weigh it with several 14‑oz cans. Chill until fully set—ideally overnight (at least 6 hours).
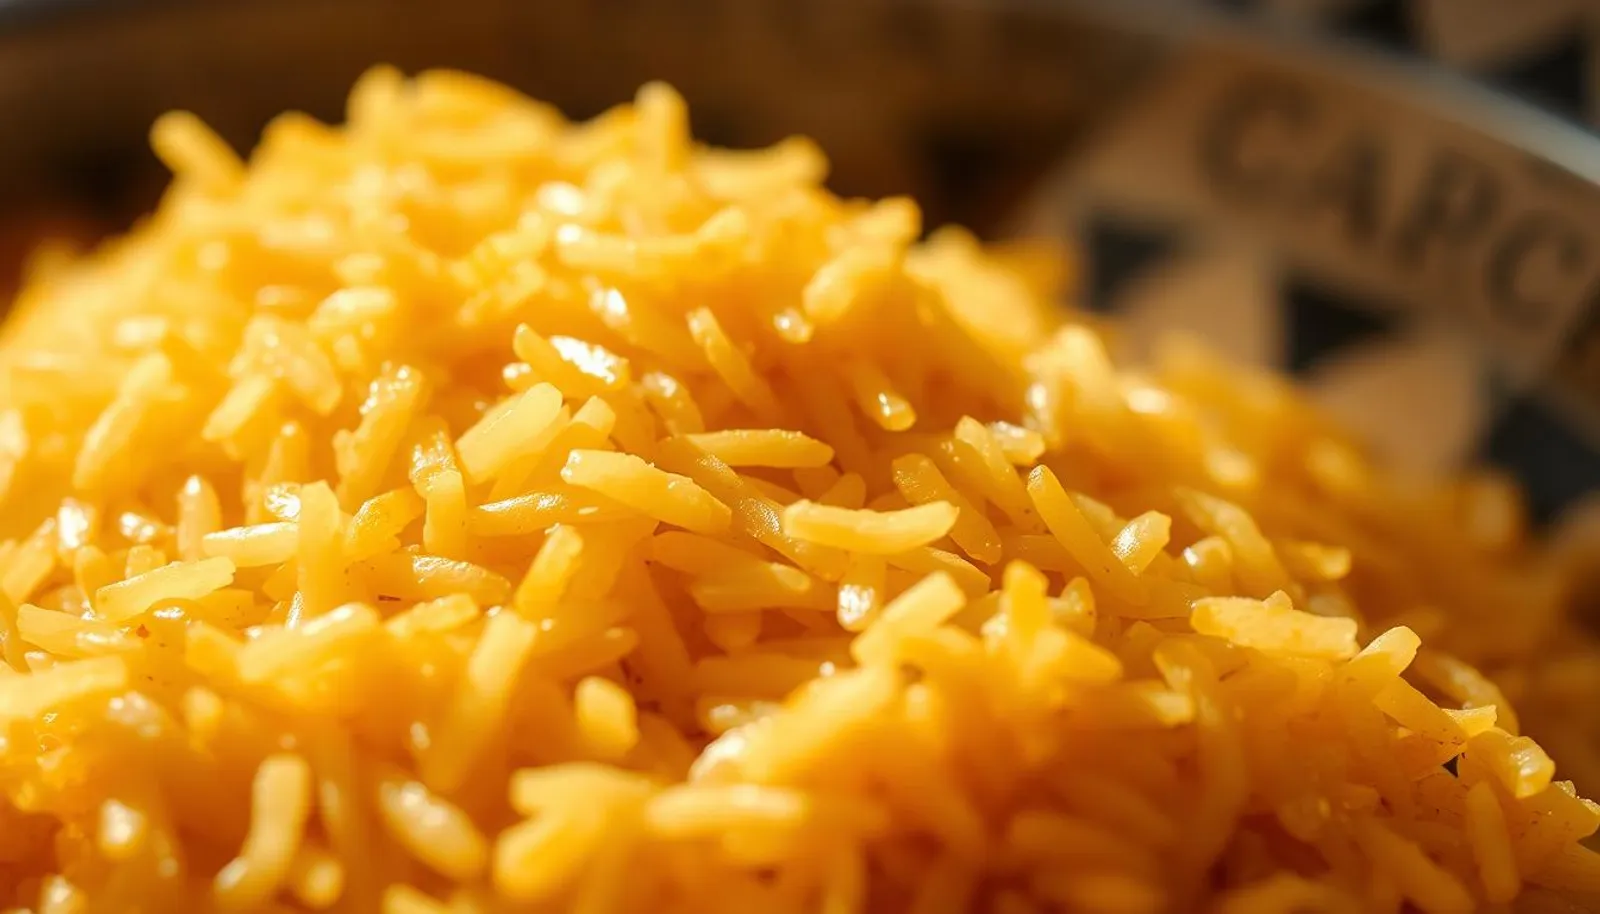
Lift the slab, wet a sharp knife, and cut into 15 even rectangles. Pour about 1/4 cup neutral oil into a wide pan and heat until it shimmers. Start medium-high to jumpstart browning, then drop to medium to finish through. Fry roughly 4 minutes per side until deeply golden.
Drain briefly and sprinkle both sides with salt while hot. Serve plain as chip-like snacks or use each cake as a luxe base for toppings such as spicy tuna, poke, or salmon mousse.
| Step | Key action | Timing |
|---|---|---|
| Cook | Water ratio, lid on, rest | Cook + 10 minutes rest |
| Press | Parchment-lined 8” pan, weigh down | Chill 6–12+ hours |
| Fry | 1/4 cup oil, medium-high then medium | About 4 minutes per side |
Skillet-baked crispy rice with buttered onions & veggies
Start by slowly caramelizing diced yellow onion in butter so the pan builds deep, sweet flavor before any other ingredient joins the mix.
Melt butter in a medium braiser and sauté the onion until golden. Add finely diced zucchini and cook until tender but not watery.
Transfer the veg to a large bowl, season with salt and pepper, and fold in crumbled feta if you like a salty finish. Toss this mix with cooked white rice (jasmine or sushi both work) so flavors distribute evenly.
Melt half a stick of butter in a heavy cast iron or braiser, press the rice mixture into an even layer, and slide the pan into a 400°F oven for 15–20 minutes. Dot the top with the remaining butter and bake about 15 minutes more until the underside is deeply browned.
- Tips: Use iron for steady heat and a reliable crust.
- Sensible substitutions: swap zucchini for mushrooms or carrots; keep dice small.
- Serve straight from the skillet or invert onto a board for tidy wedges.
For a buttery, pan-forward variation, see this crispy buttered rice recipe for inspiration.
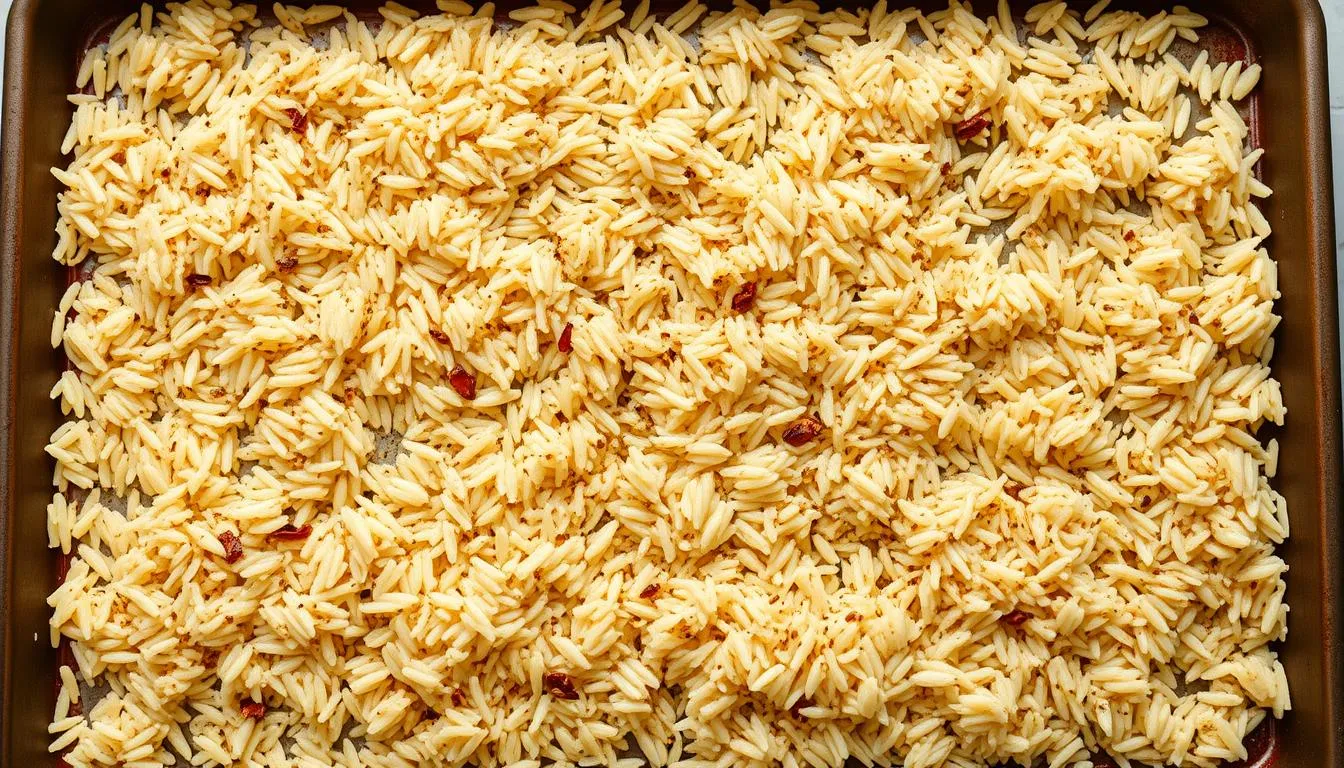
Sheet pan crispy rice with sesame oil and chili heat
Tossing day-old basmati with bold flavors makes a simple, snackable topping for bowls and salads. This method is mostly hands-off and scales easily for a crowd.
Toss the grains
In a large bowl, mix day-old cooked basmati rice with sesame oil, garlic chili sauce, salt, and pepper. Coat evenly so each grain can toast.
Spread and bake
Spread the mixture thinly on a rimmed sheet so steam can escape. Slide the pan into a hot oven at 425°F one rack below the heat source.
Finish and serve
- Bake 15 minutes, toss, then continue in 5-minute bursts until the desired texture—about 25–35 minutes total.
- Let the pan cool a few minutes so the exterior sets into a firmer crunch.
- Spoon into bowls and top with greens, herbs, or spicy tuna for a texture-forward salad.
Leftovers keep well for 2–3 days. Swap in jasmine or white rice if needed and adjust bake time by color and sound.
Pro tips for ultra-crispy texture every time
Control moisture, thickness, and timing and you’ll nail texture on the first try. This short checklist keeps each step intentional so results are repeatable.
Day-old vs. fresh: Day-old rice has shed excess surface moisture, so it browns faster and avoids steaming. If you must use fresh, spread the grains on a tray to cool quickly before you press or bake.
Thickness matters
Match thickness to method. Press a sushi rice slab to about 1/2-inch for cakes that flip cleanly. For sheet-pan batches, spread a thin, even layer so each grain toasts all the way through.
Don’t peek: steam and rest
Keep the lid on while cooking—steam finishes the interior. Let the pot rest 10 minutes off heat, then season hot so sugar and seasonings dissolve into the grains.
Oil, heat, and finishing
Start with a neutral oil to boost browning without smoking, use medium-high heat to jumpstart the crust, then lower to finish. A small pat of butter at the end adds flavor without burning.
- Press slabs firmly and weigh down while chilling for cleaner cuts.
- Use a brief freezer assist to speed setting, but don’t fully freeze.
- On sheet pans, bake ~25–35 minutes at 425°F, toss halfway, and judge by color and aroma rather than only time.
- Let pieces rest a few minutes after cooking—carryover crisping completes the job.
“Keep a short checklist for each step so your process stays consistent and your results stay crunchy.”
Toppings & ways to serve
Think of the slabs as a neutral canvas that welcomes bold, creamy, or bright toppings. Small rectangles become canapés, snacks, or a filling side for weeknight bowls and plates.
Nobu-style and chilled fish options
Channel Nobu-style vibes with spicy tuna or salmon mousse for a cool, creamy contrast. Try tuna poke dressed in gingery soy or a citrusy ceviche—chop small so the protein clings to the surface.
Comfort and fresh veggie toppings
Top with egg or chicken salad for a comforting bite. Add thin-sliced green onion and cucumber for freshness and snap, and finish with a light sprinkle of salt if needed.
Bold, simple, and party builds
Go Tex‑Mex with guacamole and salsa, or keep it simple with a soy sauce drizzle and toasted sesame. A fried egg on top turns a snack into a hearty meal—add chili crisp or hot sauce to lift the flavor.
Salads, wraps, and serving ideas
Turn pieces into a crunchy salad by tossing broken bits with greens, herbs, cucumbers, and a bright dressing. Or pile toppings onto rectangles for party canapés, or wrap in lettuce or a soft tortilla for a handheld twist.
- DIY bar: set out bowls of spicy tuna, egg salad, cucumber, scallion, and sauces so guests assemble their own.
- Finish: taste and add a final pinch of salt or a drizzle of sauce to balance each bite.
Make-ahead, storage, and reheating
Let the pressed slab chill fully before you cut or cook it. After pressing, cool the block completely and refrigerate at least 6 hours, preferably overnight. This gives clean cuts and a firmer surface so you get an even crust when you heat.
Quick-freeze caution: a short freezer assist can speed setting, but don’t freeze solid. Fully frozen slabs lose structure and become wet after thawing, which ruins texture and adds extra water to the pan.
- Store unfried slabs or leftovers in an airtight container up to 2–3 days. Use parchment between layers to stop sticking.
- Cool cooked rice quickly before refrigerating to preserve texture and food safety.
- Log your preferred cook minutes for both skillet and oven so reheats are consistent.
Re-crisping: Heat a pan until hot, add a thin film of oil, and refry pieces, flipping once. Or spread in a single layer and bake at 400–425°F for a few minutes until edges sizzle.
“A quick hit of high heat restores the crunch in minutes without drying the center.”
| Item | Storage | Best reheat | Approx time |
|---|---|---|---|
| Pressed slab | Refrigerate 6–12+ hours | Pan with a thin oil slick | 3–5 minutes per side |
| Sheet‑pan leftovers | Cool briefly, refrigerate 2–3 days | Bake 400–425°F single layer | 5–8 minutes until sizzle |
| Cooked rice for future use | Cool fast, store airtight | Use in recipe or press later | Varies by method |
Finish with a quick pinch of salt after reheating if flavors feel muted. A tiny drizzle of oil before the pan or baking can help new golden spots form and revive shine.
Conclusion
In a few deliberate steps you’ll convert plain, cooked rice into a standout component for many dishes. Use pan-pressed sushi slabs seasoned with rice vinegar and sugar, pressed to 1/2 inch, chilled, and pan-fried about 4 minutes per side until golden and salted hot.
Or follow a skillet route: buttered onions and vegetables, bake at 400°F in two stages for a deeply browned bottom. For large batches, spread and bake at 425°F for roughly 25–35 minutes, tossing halfway and cooling a few minutes to set the crunch.
strong, track your minutes, adjust heat and oil, and taste as you go. Whether topped with spicy tuna, a fried egg, or crisp cucumber and vegetable slaw, this recipe shows how to make crispy rice that adapts to grocery store finds and your favorite protein. Try one method today and you’ll know when to flip, toss, or pull for perfect results every time.
FAQ
What’s the fastest way to get a golden crust on leftover sushi or short-grain rice?
Pat cooled rice dry in a large bowl, press into a hot nonstick skillet with a thin layer of neutral oil, and cook undisturbed over medium-high heat until a deep brown forms. Flip or finish in a preheated oven if the center needs more time.
Can I use jasmine or basmati instead of sushi rice for pan-pressed cakes?
Yes. Use day-old jasmine for looser, slightly drier cakes and basmati for a lighter, grain-separated result. Adjust moisture—add a splash of rice vinegar or a beaten egg with jasmine to help cohesion for press-and-cut cakes.
How do I stop the pressed slab from falling apart when cutting?
Chill the pressed pan or slab in the fridge for at least 30–60 minutes, or briefly freeze until firm. Use a sharp, thin knife or an oiled bench scraper to make clean cuts, then handle squares gently when transferring to the skillet.
What oils or fats give the best flavor and browning?
Neutral oils with high smoke points—canola, vegetable, or grapeseed—work best for browning. Finish with a pat of butter or a drizzle of toasted sesame oil for flavor just before serving.
How do I keep the interior moist while getting a crisp exterior?
Start with properly cooked rice and cool it to reduce surface moisture. Press thinner layers for faster crisping and use medium-high heat so the exterior browns quickly while the inside stays tender. Rest briefly after cooking to let steam escape.
Is day-old rice necessary, or can I use freshly cooked rice?
Day-old rice performs better because it’s drier and holds shape. If using fresh rice, spread it on a tray to cool and dry for 15–30 minutes, or mix in a small binder like an egg to help cohesion before pressing.
Can I make a sheet-pan batch for a crowd? What temperature and timing work?
Yes. Toss rice with a thin coat of oil and seasonings, spread in a single thin layer on a rimmed baking sheet, and bake at 425–450°F, stirring or flipping once, until golden and crisp—typically 12–20 minutes depending on thickness.
What seasonings should I use for a savory, slightly tangy flavor?
Lightly season with salt, a pinch of sugar, and a splash of rice vinegar while cooling. Add toasted sesame seeds, chopped scallion, or a smear of chili-garlic sauce for heat. Adjust to taste before crisping.
How do I reheat stored crunchy pieces without losing texture?
Re-crisp in a hot skillet with a small amount of oil or on a baking sheet in a 375°F oven for 5–8 minutes. Avoid the microwave, which makes them soggy.
What are safe topping ideas for serving as canapés or a main bite?
Popular toppings include spicy tuna or salmon (Nobu-style), tuna poke, avocado and salsa, a runny fried egg, or an herbed chicken salad. Finish with scallions, cucumber, sesame, or a soy-based drizzle for balance.
Can I freeze pressed slabs for later use?
Yes—flash-freeze slabs on a sheet pan, then transfer to airtight bags. Reheat from frozen in a pan or oven until hot and crisp; allow a little extra cooking time to ensure the center heats through.
Any tips for making a vegetarian or dairy-free version?
Use neutral oil instead of butter, fold in sautéed vegetables like zucchini and caramelized onion for flavor, and top with avocado, sesame, or a soy-citrus dressing. Nutritional yeast adds a savory, cheesy note if desired.