Warabi Mochi: The Traditional Japanese Sweet Treat
Discover how to make warabi mochi, a traditional Japanese dessert, with our step-by-step guide. Learn the secrets to this sweet treat.

12 min read
I still remember the first summer I tasted this cool, wobbly confection on a busy Osaka street. The light chill, the soft bite, and the warm kinako dust felt like a small, perfect pause in the heat.
This beloved Japanese dessert is not the rice-based mochi many Americans know. It is made from bracken starch taken from the rhizomes of a fern. That unique ingredient gives it a translucent look and a jelly-like texture that melts on the tongue.
The cake itself carries almost no taste; toppings do the work. Kinako (roasted soybean flour) and kuromitsu syrup bring the flavor and contrast. True hon warabiko — 100% bracken starch — is rare and pricey, so most home cooks use substitutes and still achieve a wonderfully refreshing treat for hot days.
In this guide you’ll learn origins, how the texture differs from rice mochi, where to source ingredients in the U.S., a step-by-step recipe, and simple troubleshooting tips. For more background, see this brief overview on classic warabi mochi.
Key Takeaways
- The treat is made from bracken starch, not rice.
- Its jelly-like texture dissolves quickly in the mouth.
- Flavor comes mainly from kinako and kuromitsu toppings.
- Authentic bracken starch is rare and costly.
- This guide will cover sourcing, cooking, and fixes for texture.
What Is Warabi Mochi? Origins, Texture, and Taste
A cool, translucent block with a clean bite, the real personality arrives when it meets powder and syrup.
Bracken starch and common substitutes
Warabi mochi begins with bracken starch from a type of fern. True hon warabiko is 100% bracken starch and prized for its clarity and mouthfeel.
Most home cooks use warabimochiko blends made from sweet potato starch, tapioca, or Japanese arrowroot (kuzu). These substitutes change the final color and translucency and are easier to find for a U.S. recipe.
Note: mochiko is rice flour and not the same base—here we focus on bracken or substitute starches. Different starches react to heat and water differently, so follow package cues closely.
Signature texture and flavor
The finished bite should be a cool, softly elastic jelly that yields quickly, not the dense chew of rice confections. Watch for a thick, glue-like stage while cooking; that signals it is setting.
Flavor is subtle. Dusting with kinako (roasted soybean powder) adds nutty depth and a kuromitsu drizzle brings molasses-like sweetness. Appearance ranges from clear to slightly cloudy; hon warabiko can skew brownish.
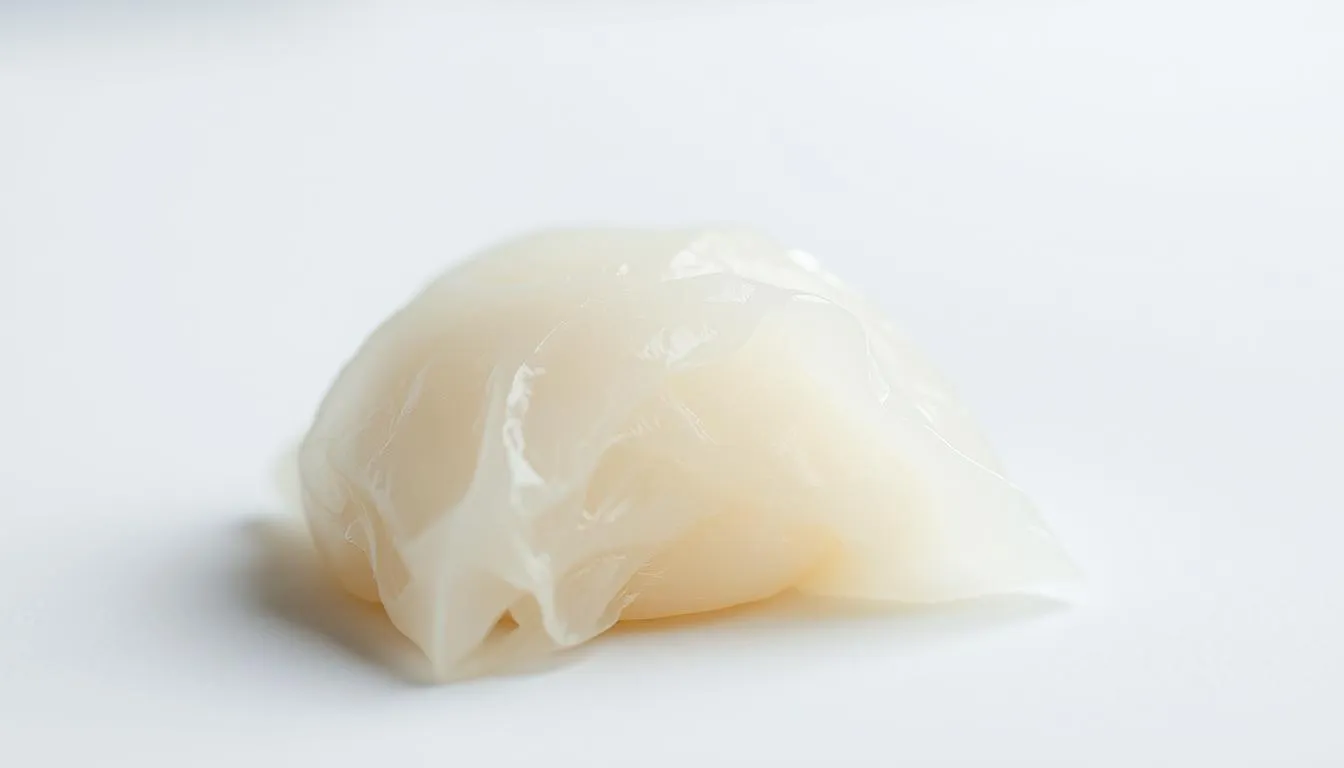
Warabi mochi
This jelly-like sweet is typically cut into small cubes and finished with a dusting of powder.
At a glance: a warabi-based, mochi-like dessert, usually shaped into cubes and coated in roasted soybean powder or similar toppings.
When made with authentic hon warabiko — that is, made bracken starch — the pieces often appear brownish to blackish and may be sold as clay-colored pebbles rather than a fine powder. That pure type gives a distinct, delicate mouthfeel and a darker hue.
Most commercial products in the U.S. use starch substitutes like sweet potato or tapioca. These are commonly labeled as warabi mochiko and arrive as a fine powder, which is easier for home cooks to use.
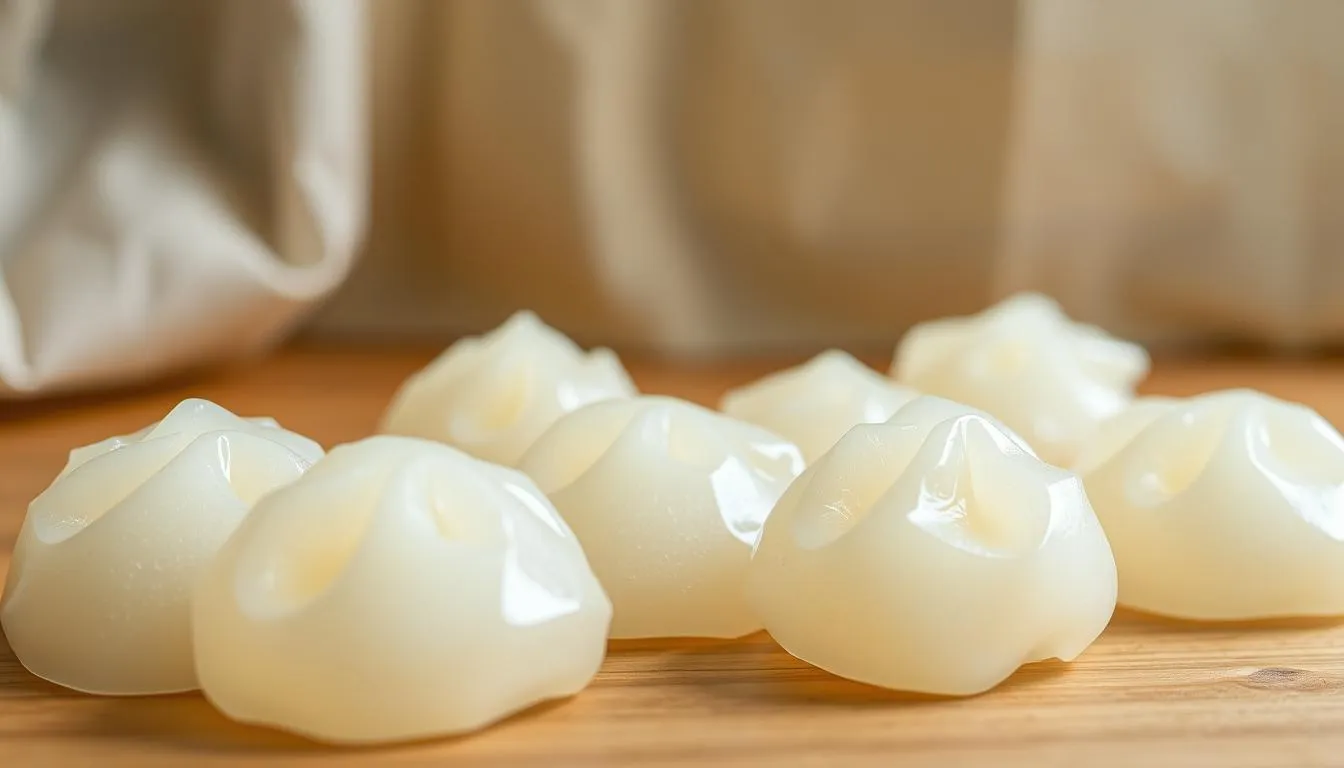
Serving and storage are simple: authentic pieces are best at room temperature and enjoyed the same day for peak texture. If you don’t have hon bracken, rest assured that substitute starches still yield a delicious result that captures the spirit of this classic sweet.
For a reliable home recipe and tips on working with substitutes, check a trusted classic recipe.
Ingredients and Tools You’ll Need at Home
With a short shopping list and one saucepan, you can make a delicate, refreshing sweet at home.
Core ingredients
Starch, sugar, and water form the base. Add kinako (roasted soybean powder) for dusting and a brown-sugar syrup for finish.
Smart substitutions
True bracken starch or bracken starch blends (warabimochiko) are ideal but costly. Practical options include tapioca starch, potato starch, or Japanese arrowroot (kuzu).
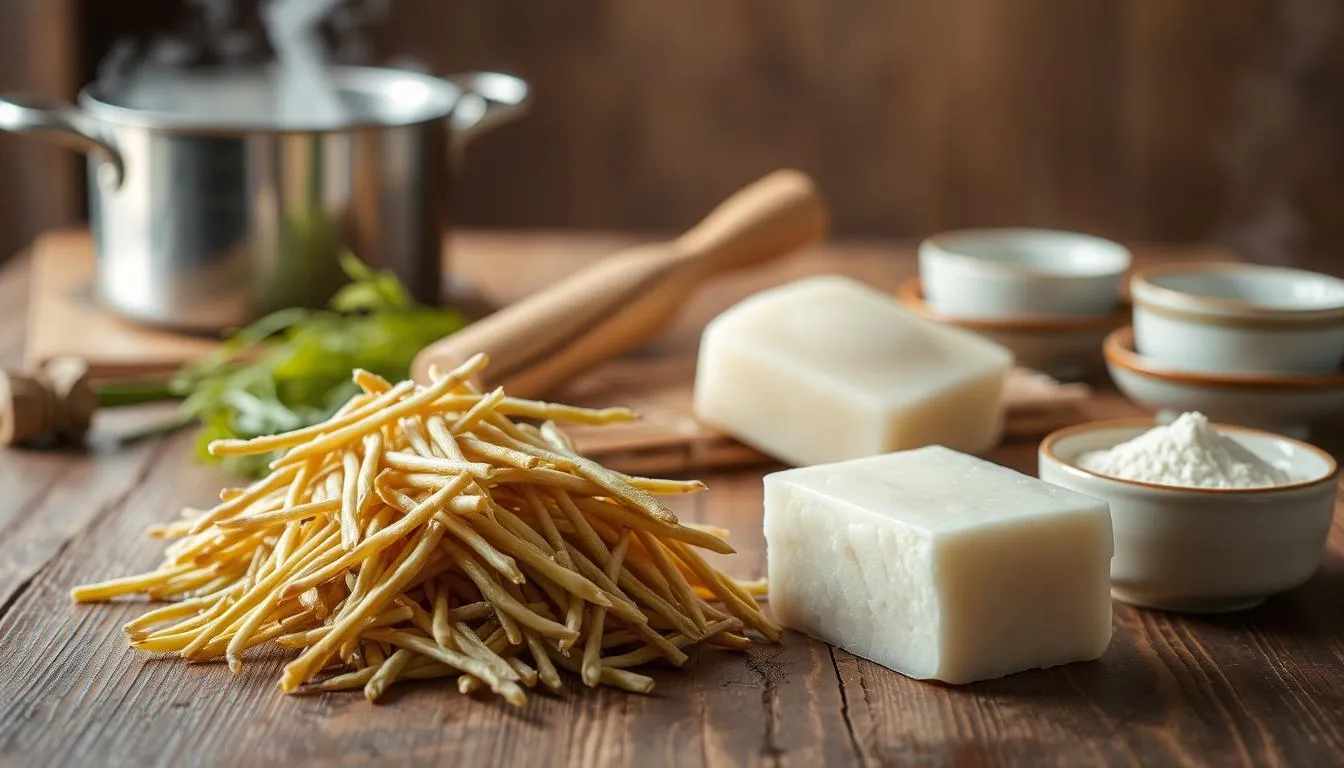
Equipment checklist
Use a medium saucepan, a sturdy spatula, and a shallow container or baking sheet lined with plastic wrap for a clean release.
| Item | Why it matters | Best U.S. source |
|---|---|---|
| Starch (100 g) | Gives texture; equal parts with sugar by weight | Japanese or Asian grocery; tapioca at mainstream stores |
| Sugar (100 g) | Sweetens and helps set the gel | Any grocery; dark brown sugar for kuromitsu |
| Water (450–600 mL) | Adjusts firmness (4:1 to 6:1 water:starch) | Tap or filtered water |
| Kinako (powder) | Roasted soybean flour for coating | Asian markets or online |
Quick tip: Measure accurately and prep the container first. The cooked starch thickens fast when it hits the right heat.
Step-by-Step: How to Make Warabi Mochi From Scratch
Ready to make a cool, jelly-like treat at home? Follow these clear steps and work steadily—timing and control matter.
Mix the base
Whisk starch, sugar, and water in a saucepan until the mixture is smooth with no dry pockets. Use a small whisk or spatula so the slurry blends evenly.
Cook with control
Set the pan over medium heat. Stir continuously; watch as the mixture thickens and then turns glue-like. When it becomes mostly translucent, reduce the heat and stir vigorously so color and texture even out.
Set, chill, and serve
Scrape the hot gel into a plastic-lined container or a kinako-dusted sheet. Cool to room temperature, then chill for 15–20 minutes.
- Turn out the slab and dust a knife with kinako or water before cutting into 3/4-inch cubes.
- Toss pieces in kinako powder and drizzle kuromitsu or brown sugar syrup on top just before serving.
Texture, Ratios, and Troubleshooting for Perfect Results
A few simple ratio tweaks make the difference between firm cubes and a tender, springy bite.
Water-to-starch balance: For clean-cut, firm cubes aim for about 4:1 water to starch. For a softer, stretchier set, increase the water toward 6:1. Measure by weight when possible — it keeps the final texture consistent.
Boil or not to boil: Some commercial mixes ask for a brief boil; others warn against rapid rolling. Watch the mixture as it heats. The cue is a thick, glue-like mass and mostly even translucency, not a fixed minute count.
Quick fixes:
- If the color stays cloudy, stir gently over low heat until the starch fully hydrates and color evens out.
- If pieces turn hard or whitish after chilling, reduce cook time by a minute or add a touch more water next batch.
- If the mixture won’t set, cook longer to drive off excess water and ensure full gelatinization, then chill briefly.
Temperature tips: Keep heat moderate and steady. Scorching causes uneven color and off flavors, while too-low heat leaves an undercooked gel.
Serving Ideas and Sourcing in the United States
Pair a roasted-soybean powder with a rich black-sugar syrup to create classic flavor balance.
Classic toppings highlight contrast. Dust cubes generously with kinako for a nutty, almost peanut-butter note. Finish with a thin drizzle of kuromitsu or a dark brown sugar syrup for deep, molasses-like sweetness.
Where to buy ingredients
Look for warabi mochiko, kinako, and kuromitsu at Japanese grocery stores, larger Asian grocery, or online marketplaces. If a specialty item is unavailable, potato starch or tapioca blends work well in a home recipe.
Flavor variations
Try black sugar styles of syrup for a bolder finish. Add a spoonful of sweet red-bean paste or fresh seasonal fruit for color and texture contrast.
Serving tips
- Dust with kinako and pour a light coat of syrup right before serving to keep pieces tender.
- Use brown sugar dissolved in water to make an easy sugar syrup at home.
- For a quick swap, grind roasted nuts as a powder alternative until you can restock kinako.
| Item | Why to choose | Where to buy |
|---|---|---|
| Kinako (roasted soybean flour) | Nutty coating, classic flavor | Japanese grocery stores, online |
| Kuromitsu / black sugar syrup | Deep molasses sweetness | Asian stores, DIY with brown sugar |
| Warabimochiko or potato starch | Texture base when bracken is scarce | Asian markets, mainstream grocery |
Storage, Shelf Life, and Make-Ahead Tips
Storing this delicate jelly correctly keeps its texture bright and avoids an unwanted chalky surface. Keep preparation and storage simple so the treat stays tender and visually appealing.
Room handling: Let the slab cool to room temperature before a brief chill of 15–20 minutes to set the gel. Serve at room temperature the same day for the best bounce, color, and mouthfeel.
Refrigeration caution: Authentic pieces made with made bracken starch can harden and turn white when refrigerated. Long cold storage dries the surface and changes color.
Timing and make-ahead practicalities
- Cook time: minutes on medium heat until the mixture becomes glue-like and mostly translucent.
- Chill time: 15–20 minutes to firm the slab before cutting into cubes.
- Serving window: aim to serve the same day; leftovers without syrup keep best.
“Add syrup only just before serving to keep the coating dry and the exterior bouncy.”
Packing and short-term storage
Use a sealed container at room temperature for plain cubes. This keeps them soft for up to one or two days depending on your starch blend.
| Storage method | Best for | Notes |
|---|---|---|
| Room temperature in sealed container | Plain cubes without syrup | Keeps texture for 1–2 days; check color and softness |
| Brief chilling (15–20 minutes) | Setting slab before cutting | Helps clean cuts; do not over-chill |
| Refrigeration | Not recommended for authentic bracken versions | Can harden surface, turn white, and dry out pieces |
Conclusion
With a saucepan, spatula, and the right starch, a refreshing, soft cube is within reach. This guide shows how a simple mixture becomes a light jelly when you balance water and starch and watch temperature and time.
You can make authentic-feeling warabi mochi at home using bracken starch or common substitutes like potato starch or tapioca. Find kinako, kuromitsu, and specialty flour at local grocery stores or order online. Dark brown sugar makes an easy syrup if you skip kuromitsu.
Serve pieces the same day for best texture. Store extras in a sealed container at room temperature briefly. Experiment with toppings and types of starch, but keep the core ratios and the recipe cues—those are what deliver the delicate bite.
FAQ
What is this traditional Japanese sweet treat made from?
The dessert is a jelly-like confection traditionally made from bracken starch (hon warabiko), sugar, and water. It’s usually coated in kinako (roasted soybean flour) and topped with kuromitsu, a brown sugar syrup, for a nutty, sweet finish.
Can I substitute bracken starch with other flours or starches?
Yes. Authentic bracken starch is rare and expensive, so many home cooks use potato starch, tapioca starch, sweet potato starch, or kudzu (Japanese arrowroot) as substitutes. Each yields slightly different texture and translucency, so adjust water-to-starch ratios accordingly.
What texture should I aim for and how do I get it right?
Aim for a soft, jelly-like chew rather than a dense gummy block. Use a 4:1 water-to-starch ratio for firmer pieces and up to 6:1 for a softer, stretchier bite. Stir constantly over medium-low heat until the mixture turns glossy and thickens to a glue-like consistency.
How do I make kuromitsu (brown sugar syrup) at home?
Kuromitsu is easy: simmer dark brown sugar or black sugar with water until it dissolves and thickens slightly. Cool to room temperature before drizzling over the coated cubes for best flavor contrast.
Why did my confection turn cloudy or fail to set?
Cloudiness or failure to set usually comes from incorrect starch ratios, insufficient heat, or adding cold water to hot starch. Reheat gently and whisk, or start over with precise measurements and gradual heating to ensure gelatinization of the starch.
Should I boil the mixture, and does it depend on the starch used?
You generally heat until the mixture thickens rather than a rolling boil. Some starches need a brief boil to become translucent, while others set better with steady simmering. Watch texture changes and follow the cues for your chosen starch.
What equipment do I need to make this at home?
Basic kitchen tools are enough: a small saucepan, heatproof spatula, a shallow container or baking sheet to set the mixture, plastic wrap, and a sharp knife for cutting. A sieve helps dust kinako evenly.
How long does it take from start to finish?
Active cooking takes about 10–15 minutes. Cooling to room temperature and a brief chill in the refrigerator can add 20–30 minutes, so plan roughly 45 minutes to one hour for the whole process.
How should I store leftovers and how long do they keep?
Store in an airtight container in the refrigerator for up to two days. Keep kinako and syrup separate until serving to preserve texture. Room temperature storage shortens shelf life and may soften the pieces too much.
Where can I buy authentic ingredients in the United States?
Look for hon warabiko, kinako, kuromitsu, and specialty starches at Japanese grocery stores like Mitsuwa or Nijiya, Asian supermarkets, or online retailers such as Amazon and specialty Japanese food shops.
Any serving ideas or flavor variations to try?
Classic toppings include kinako and kuromitsu. Try variations like black sugar, adzuki (red bean) paste, matcha powder, or seasonal fruit. Toasted sesame or a sprinkle of flaky salt can also add an interesting twist.